

engineering grout for machinery foundations

Engineering Grout for Machinery Foundations and Base Plates

Engineering Grout for Machinery Foundations and Base Plates

Machinery and industrial equipment are commonly installed over reinforced-concrete foundations. Although the machine rests on a steel base plate, the base plate does not usually make direct and complete contact with the concrete foundation.

A designed gap is left between the base plate and the foundation so the equipment can be positioned, aligned and levelled. This gap must then be filled with a suitable engineering grout.

The grout is not merely a material used to hide or fill the visible space. It forms an important load-transfer interface between the machine and the concrete foundation.

Incorrect grout selection or application can result in voids, loss of contact, poor support, alignment concerns, vibration-related problems and premature maintenance.

This guide explains how engineers, industrial contractors and plant-maintenance teams should select engineering grout for machinery foundations, base plates and anchoring applications.

1. Understand the Function of Engineering Grout

Engineering grout performs several important functions beneath machinery and equipment.

It helps:

  • Fill the designed gap beneath the base plate
  • Establish contact between steel and concrete
  • Transfer operational loads to the foundation
  • Fill confined areas around anchor bolts
  • Support alignment and levelling
  • Reduce the risk of unsupported sections
  • Provide a durable interface beneath the equipment

The grout should work as part of the complete machine-foundation system.

Foundation design, anchor arrangement, base-plate stiffness, equipment loading and installation quality all influence performance.

2. Why Ordinary Mortar Is Not Suitable

Ordinary site-made cement and sand mortar may appear economical, but it is generally not designed for precision grouting.

Potential limitations include:

  • Inadequate flow under wide base plates
  • Difficulty filling narrow or congested gaps
  • Shrinkage after placement
  • Variable water addition
  • Inconsistent aggregate grading
  • Inconsistent strength
  • Bleeding and segregation
  • Hidden voids
  • Poor contact around anchor locations

A mortar that looks satisfactory at the visible edges may still leave unfilled areas beneath the centre of the plate.

Purpose-designed engineering grout is manufactured to provide controlled flow, strength development and dimensional stability when mixed and placed according to the Technical Data Sheet.

3. Determine Whether the Equipment Is Static or Dynamic

The operating condition of the equipment is an important selection factor.

Static equipment

Examples may include:

  • Tanks
  • Columns
  • Storage vessels
  • Structural supports
  • Light equipment frames
  • Certain processing units

These installations primarily transfer static loads, although thermal and operational movement may still occur.

Dynamic equipment

Examples may include:

  • Compressors
  • Turbines
  • Pumps
  • Generators
  • Crushers
  • Mills
  • Heavy rotating machinery
  • Reciprocating equipment

Dynamic equipment may create vibration, impact, cyclic loading and repeated operational stresses.

Grout for dynamic machinery should be selected based on the machine manufacturer’s requirements, foundation design and expected operating conditions.

4. Measure the Grout Gap Correctly

Grout gap is one of the most important selection criteria.

The selected product should be suitable for the:

  • Minimum gap
  • Maximum gap
  • Length and width of the base plate
  • Volume of grout
  • Placement distance
  • Congestion around anchor bolts
  • Accessibility of the pouring area

A product developed for a relatively narrow gap may not be suitable for a deep foundation pocket without approved aggregate extension or a different grout grade.

For example, Fairmate Prashita’s FLOWGROUT 60 is intended for suitable precision-grouting applications within its specified gap range. For deeper sections or larger volumes, the latest TDS and technical recommendation should be followed.

Never assume that one grout grade can be used at any thickness.

5. Review Strength Requirements

Engineering grout may need to achieve:

  • Early strength for equipment installation
  • Strength before bolt tightening
  • Strength before machine commissioning
  • Long-term compressive strength
  • Suitable load-bearing capability

However, the highest available compressive strength is not automatically the correct choice.

The selected grout must also provide:

  • Suitable flow
  • Non-shrink behaviour
  • Good dimensional stability
  • Correct application thickness
  • Compatible stiffness
  • Reliable placement
  • Appropriate durability

A high-strength grout that cannot be placed properly under the base plate will not provide the required support.

6. Select the Correct Flow Consistency

Engineering grout may be mixed to different consistencies depending on the product and application.

Typical categories include:

  • Plastic
  • Flowable
  • Highly flowable

A flowable or highly flowable grout is commonly selected where the material needs to travel beneath a plate and around anchor locations.

Water should never be increased beyond the recommended range simply to improve flow. Excess water may contribute to:

  • Lower strength
  • Increased porosity
  • Segregation
  • Bleeding
  • Greater dimensional change
  • Reduced durability

The required flow should be achieved using the correct product and approved water ratio.

7. Consider Cementitious or Resin Grout

Engineering grouts may broadly be divided into cementitious and resin-based systems.

Cementitious non-shrink grout

Cementitious grout is widely used for:

  • Machinery base plates
  • Equipment foundations
  • Anchor bolts
  • Structural supports
  • Crane rails
  • General industrial grouting

Advantages may include:

  • Free-flowing placement
  • Non-shrink performance
  • High compressive strength
  • Compatibility with concrete foundations
  • Practical application for many industrial installations

Resin or epoxy grout

Resin-based grout may be considered where there are demanding requirements involving:

  • Severe dynamic loading
  • High vibration
  • Chemical exposure
  • Oil contamination risk
  • Rapid commissioning
  • Exceptional mechanical performance
  • Special machine-manufacturer requirements

The correct system should be selected with reference to operating conditions and engineering specifications.

8. Prepare the Concrete Foundation

Correct foundation preparation is essential for grout bonding and load transfer.

The concrete surface should be:

  • Structurally sound
  • Free from laitance
  • Free from loose material
  • Free from dust and debris
  • Free from oil and grease
  • Properly roughened where specified
  • Cleaned before placement

For cementitious grout, the concrete may need to be saturated with clean water before application, while ensuring there is no standing water when grout placement begins.

The latest product instructions should always be followed.

9. Prepare the Base Plate and Anchor Locations

The underside of the base plate should be clean and free from:

  • Oil
  • Grease
  • Loose rust
  • Paint contamination
  • Dirt
  • Debris

Anchor-bolt pockets should be inspected and cleaned before grouting.

The installation team should also confirm:

  • Correct machine alignment
  • Correct levelling
  • Stable shims or levelling devices
  • Proper anchor-bolt positioning
  • Adequate grout access
  • Suitable venting arrangements

Grout cannot compensate for incorrectly aligned machinery or an inadequately designed foundation.

10. Use Strong and Leakproof Formwork

Engineering grout is often highly flowable. Weak or poorly sealed formwork can result in leakage, loss of grout head and incomplete placement.

Formwork should be:

  • Strong enough to resist grout pressure
  • Sealed at joints
  • Securely fixed
  • Extended above the base plate where a grout head is required
  • Designed to permit continuous placement
  • Treated with a suitable release material where required

Foam, sealant or mortar may be used to seal formwork joints depending on the application.

A trial check with water may be useful before grout placement, provided the area is subsequently prepared according to product instructions.

11. Mix the Grout Correctly

Engineering grout should be mixed using suitable mechanical equipment.

A typical process involves:

  1. Measuring the required clean water
  2. Adding most of the water to the mixing container
  3. Adding the grout powder gradually
  4. Mixing until a uniform consistency is achieved
  5. Adding the remaining permitted water if required
  6. Mixing for the specified duration
  7. Placing within the stated working time

Avoid:

  • Hand mixing large batches
  • Estimating the water quantity
  • Adding additional water after the grout begins stiffening
  • Mixing more material than can be placed in time
  • Using contaminated containers or tools

Consistent batch preparation is important when grouting large machinery bases.

12. Pour Continuously from One Side

Grout should generally be placed continuously from one side of the base plate.

This helps push air ahead of the grout and reduces the likelihood of trapping voids beneath the plate.

Good placement practice includes:

  • Maintaining a continuous grout flow
  • Keeping an adequate grout head
  • Avoiding placement from several opposing sides
  • Providing controlled venting
  • Using suitable chains or straps only where permitted
  • Ensuring the pour is not interrupted
  • Preparing sufficient material and labour before starting

Random pouring from multiple sides may trap air in the centre of the base plate.

13. Plan the Grouting Operation Before Mixing

Before beginning, the site team should confirm:

  • Total grout volume
  • Additional allowance for wastage
  • Number of bags required
  • Water quantity
  • Mixing capacity
  • Number of mixers
  • Manpower
  • Placement route
  • Formwork condition
  • Backup equipment
  • Ambient temperature
  • Expected working time

Large machinery foundations should not be treated as improvised repair activities.

A documented method statement and coordinated placement plan can reduce interruptions and inconsistency.

14. Consider Temperature and Site Conditions

Temperature affects grout behaviour.

High temperatures may:

  • Reduce working time
  • Increase water demand
  • Cause rapid moisture loss
  • Increase placement difficulty

Low temperatures may:

  • Slow strength development
  • Extend setting time
  • Delay commissioning

Water, grout bags, equipment and the foundation may need to be protected from extreme temperatures.

Product-specific guidance should be followed for hot- or cold-weather placement.

15. Complete Curing and Finishing

After placement, exposed grout shoulders and surfaces should be finished and cured according to the Technical Data Sheet.

Poor curing may contribute to:

  • Surface cracking
  • Rapid moisture loss
  • Weak exposed edges
  • Reduced durability

The equipment should not be commissioned until the required grout strength has been achieved.

Final tightening, loading and commissioning should follow the machine supplier’s and engineer’s requirements.

16. Select the FLOWGROUT Grade for the Application

Fairmate Prashita’s FLOWGROUT range provides engineering grout solutions for suitable applications such as:

  • Machinery foundations
  • Steel base plates
  • Anchor bolts
  • Equipment foundations
  • Crane rails
  • Structural bearing areas
  • Industrial installations

FLOWGROUT 60 is an ultra-high-strength, free-flowing and non-shrink cementitious grout for suitable precision-grouting applications within its stated parameters.

Final selection should consider:

  • Machine load
  • Operating condition
  • Grout gap
  • Required strength
  • Placement method
  • Exposure
  • Foundation condition
  • Commissioning schedule

The latest Technical Data Sheet and project-specific recommendation should be reviewed before use.

Engineering Grout Selection Checklist

Before selecting engineering grout, confirm:

  • Is the equipment static or dynamic?
  • What is the machine operating load?
  • What is the minimum and maximum grout gap?
  • What are the base-plate dimensions?
  • What early strength is required?
  • When will the machine be commissioned?
  • Is the grout area exposed to oil or chemicals?
  • Can grout be poured continuously from one side?
  • Is the foundation sound and prepared?
  • Is the formwork leakproof?
  • Has sufficient grout and mixing capacity been arranged?
  • Has the latest TDS been reviewed?

Conclusion

Stable machinery support begins below the base plate.

Engineering grout should be selected as part of the complete equipment-foundation system—not as an ordinary gap-filling mortar.

Correct selection depends on:

  • Equipment loading
  • Static or dynamic operation
  • Grout-gap depth
  • Required flow
  • Strength development
  • Foundation preparation
  • Placement access
  • Exposure conditions
  • Commissioning requirements

Purpose-designed, free-flowing and non-shrink engineering grout helps achieve reliable contact beneath machinery base plates when installed correctly.

For FLOWGROUT TDS, product selection and machinery-foundation grouting guidance, contact:

Fairmate Prashita LLP
Advanced Construction Chemical Solutions

🌐 www.fairmateprashita.com
📞 Toll-Free: 1800 571 8862
Concrete Repair Mortar and Crack Repair Product Selection Guide

Concrete Repair Mortar and Crack Repair Product Selection Guide

Concrete Repair Mortar and Crack Repair Product Selection Guide

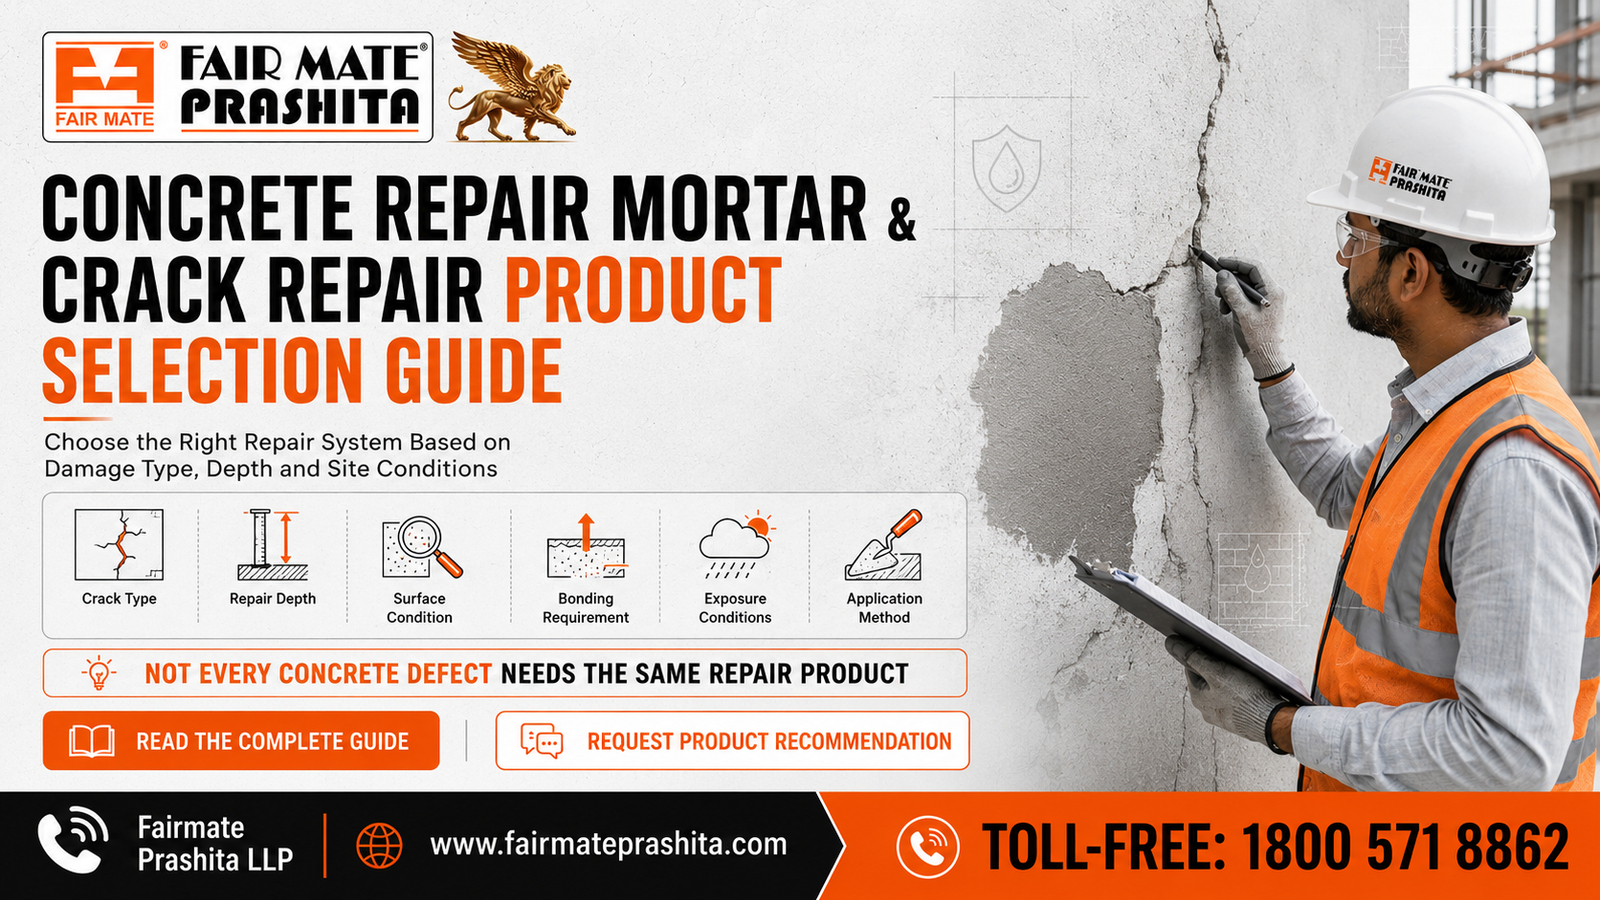
Concrete cracks, spalling, damaged edges and surface deterioration are common problems in residential, commercial, industrial and infrastructure structures. However, not every concrete defect should be treated using the same repair material.

A narrow surface crack may require a compatible crack-filling product. A damaged floor edge may require a fast-setting repair mortar. Deep concrete loss around reinforcement may require a structural repair mortar or flowable micro-concrete.

Selecting a product only by looking at the visible damage can result in temporary repairs, recurring cracks, debonding or continued water ingress. A reliable concrete repair begins with correct diagnosis, suitable surface preparation and selection of a repair material that matches the site condition.

This guide explains the main factors contractors, engineers and builders should consider when selecting concrete repair mortar and crack-repair products.

1. Identify the Type of Concrete Damage

The first step is to determine what kind of defect is present.

Common concrete defects include:

  • Hairline surface cracks
  • Wider cementitious cracks
  • Active or moving cracks
  • Dormant cracks
  • Spalled concrete
  • Loose or delaminated concrete
  • Broken floor and pavement edges
  • Surface blowholes and blemishes
  • Exposed reinforcement
  • Deep loss of concrete section
  • Damage caused by impact or abrasion

Each condition may require a different repair approach.

For example, filling a visible crack may be appropriate when the surrounding concrete is sound and the crack is suitable for cementitious treatment. However, crack filling alone will not solve a problem involving loose concrete, corroded reinforcement or continuing structural movement.

Where the cause or structural significance is uncertain, the area should be assessed by a qualified engineer before repair work begins.

2. Determine Whether the Crack Is Active or Dormant

Cracks should not be classified only by width.

An active crack may continue to open, close or move because of:

  • Thermal expansion and contraction
  • Structural loading
  • Settlement
  • Vibration
  • Drying shrinkage
  • Movement at joints
  • Foundation-related changes

A dormant crack has generally stabilised and is not expected to experience significant further movement.

Rigid cementitious crack-filling materials are generally more suitable for appropriate dormant cracks. Active cracks may require a flexible treatment, joint system or engineered repair procedure capable of accommodating movement.

Applying a rigid material over an active crack may lead to the crack reappearing beside or through the repaired area.

3. Check the Repair Depth and Size

Repair depth is a major factor in product selection.

Thin surface correction

Small surface imperfections, pinholes, blowholes and minor irregularities may require a fine fairing coat rather than a general patch repair mortar.

Fairing coats are commonly used before applying protective coatings or decorative finishes. Their purpose is to create a smooth and consistent concrete surface.

Localised patch repair

Shallow or medium-depth repairs on walls, columns, slabs and concrete edges may require a hand-applied cementitious repair mortar.

The selected material should be suitable for the repair orientation and specified layer thickness.

Deep structural repair

Deep repairs, significant section loss and congested areas around reinforcement may require a flowable repair micro-concrete placed inside properly sealed formwork.

A product suitable for hand application may not flow effectively into deep or inaccessible areas.

4. Match the Product to the Application Orientation

Concrete repairs may be horizontal, vertical or overhead.

A flowable material can perform well in a formed horizontal or deep repair, but it may not be suitable for an exposed vertical surface. Similarly, a stiff vertical repair mortar may not flow beneath reinforcement or into narrow voids.

Product selection should consider:

  • Horizontal floor repair
  • Vertical wall or column repair
  • Beam-side repair
  • Overhead soffit repair
  • Form-and-pour application
  • Hand-applied patch repair
  • Thin finishing application

Always confirm the recommended orientation and application thickness in the current Technical Data Sheet.

5. Evaluate the Substrate Condition

Repair mortar must bond to sound concrete.

Before application, contractors should remove:

  • Loose concrete
  • Weak or friable material
  • Dust and debris
  • Oil and grease
  • Old coatings
  • Laitance
  • Unsound previous repairs
  • Corrosion products around reinforcement

The repair perimeter should be formed properly so that the new material does not finish at weak, feathered edges unless the selected product specifically permits it.

Depending on the repair system, the substrate may require pre-wetting, a bonding slurry or a specified bonding agent.

Even a high-performance repair mortar may fail when applied over contaminated, dusty or weak concrete.

6. Consider Bond Strength and Compatibility

The repair material and original concrete should work together as a system.

Important compatibility factors include:

  • Bond strength
  • Compressive strength
  • Modulus and stiffness
  • Shrinkage behaviour
  • Thermal movement
  • Permeability
  • Application thickness
  • Exposure conditions

Selecting the strongest available mortar is not always the correct approach. A repair material that is excessively rigid compared with the surrounding concrete may create stress concentrations near the repair boundary.

The objective should be suitable and compatible performance, not simply the highest numerical strength.

7. Control Shrinkage and Water Addition

Shrinkage can lead to:

  • Fine cracks
  • Debonding
  • Separation at repair edges
  • Water-entry paths
  • Loss of contact
  • Reduced durability

Prepacked repair mortars improve control because the cement, aggregates, fillers and additives are proportioned during manufacturing.

However, site practices remain important.

Contractors should:

  • Measure water accurately
  • Follow the stated mixing range
  • Mix mechanically where recommended
  • Avoid adding extra water for easier finishing
  • Avoid retempering material that has started to set
  • Respect the stated application thickness
  • Compact the mortar properly
  • Complete the required curing procedure

Excessive water may initially improve workability, but it can reduce strength and increase porosity and shrinkage.

8. Select According to Return-to-Service Requirements

Some repairs must be completed where prolonged shutdowns are not practical.

Examples include:

  • Industrial floors
  • Factory movement areas
  • Warehouses
  • Pavements
  • Loading zones
  • Commercial access routes
  • Maintenance areas

A fast-setting repair mortar may be appropriate where early finishing or reduced disruption is required.

Fairmate Prashita’s CEMSCREED FAST REPAIR is developed for fast repairs to suitable concrete and plaster surfaces, including concrete floors and pavements where operational disruption needs to be reduced.

The required return-to-service time should always be confirmed against the latest product data and site temperature.

9. Consider the Exposure Conditions

A repair material should be selected for the environment in which it will perform.

Consider:

  • Internal or external exposure
  • Wet or dry conditions
  • Traffic and abrasion
  • Impact
  • Chemical contact
  • Heat and temperature variation
  • Water-retaining conditions
  • Marine or chloride exposure
  • Subsequent waterproofing or coating

An external repair exposed to rain and temperature changes faces different requirements from an internal wall repair.

Similarly, an industrial floor exposed to abrasion may require a different system from a fairing repair beneath a protective coating.

10. Select the Correct Repair Product Category

A complete concrete repair range may include several product types.

Crack-repair mortar

Suitable for compatible, prepared cementitious cracks on horizontal or vertical surfaces.

Fairmate Prashita’s CRACKSEAL SUPER is a prepacked, high-strength and fast-setting crack-repair mortar for suitable cementitious crack-treatment applications.

Fast-setting repair mortar

Suitable for concrete floors, pavements and local repairs where work needs to progress quickly.

CEMSCREED FAST REPAIR is designed for suitable concrete and plaster repairs where fast setting and reduced disruption are important.

Fairing coat

Used for thin-layer correction of surface blemishes, blowholes and irregularities before protective coating or finishing.

CEMSCREED FAIRING COAT is intended for suitable surface finishing and fairing applications.

Structural repair mortar or micro-concrete

Used where deeper repair, section rebuilding or placement around reinforcement is required.

CEMSCREED HM(F) is a free-flowing, fibre-containing, non-shrink repair micro-concrete for suitable structural repair and difficult-to-place areas.

Epoxy repair mortar

Used where high early strength, abrasion resistance or impact resistance is important.

FAIRSCREED R is an epoxy-based repair mortar for suitable industrial and heavy-duty repair applications.

Final product selection should always be confirmed against the current TDS and project requirements.

11. Do Not Ignore Reinforcement Corrosion

Spalling often occurs because reinforcement has started corroding.

When reinforcement is exposed, the repair process may involve:

  1. Removing unsound concrete around the steel
  2. Cleaning corrosion and contaminants
  3. Assessing the loss of steel section
  4. Replacing or supplementing steel where specified
  5. Applying reinforcement protection where required
  6. Rebuilding the concrete section using a suitable repair material
  7. Curing and protecting the completed repair

Simply covering corroded steel with fresh mortar may allow deterioration to continue beneath the repaired surface.

12. Follow Correct Curing and Protection Procedures

Repair work is not complete immediately after finishing.

Curing helps control moisture loss and supports proper strength development. Poor curing may contribute to:

  • Surface cracking
  • Weak development
  • Dusting
  • Reduced durability
  • Premature repair failure

The repaired area should be protected according to product instructions and environmental conditions.

Depending on exposure, the completed repair may also require waterproofing, a protective coating or another surface-protection treatment.

Concrete Repair Product Selection Checklist

Before selecting a repair product, confirm:

  • What caused the damage?
  • Is the crack active or dormant?
  • Is the surrounding concrete sound?
  • Is reinforcement exposed?
  • What is the repair depth?
  • Is the application horizontal, vertical or overhead?
  • Is formwork required?
  • What strength and return-to-service time are needed?
  • Will the area face water, traffic, abrasion or chemicals?
  • Is a protective coating required after repair?
  • Has the latest TDS been reviewed?

Conclusion

Concrete repair should not be treated as a cosmetic patching exercise.

The right product depends on crack movement, repair depth, substrate condition, reinforcement condition, exposure, application orientation and performance requirements.

Correct diagnosis and preparation help determine whether the site needs:

  • Crack filling
  • Fast patch repair
  • Surface fairing
  • Structural repair mortar
  • Flowable micro-concrete
  • Epoxy repair
  • A complete rehabilitation system

Fairmate Prashita provides concrete repair products and technical guidance for contractors, builders, consultants and project teams.

For the latest Technical Data Sheet or a project-specific product recommendation, contact:

Fairmate Prashita LLP
Advanced Construction Chemical Solutions

🌐 www.fairmateprashita.com
📞 Toll-Free: 1800 571 8862
Terrace Waterproofing Before Monsoon

Terrace Waterproofing Before Monsoon: Technical Checklist for Contractors and Homeowners

Terrace Waterproofing Before Monsoon: Technical Checklist for Contractors and Homeowners

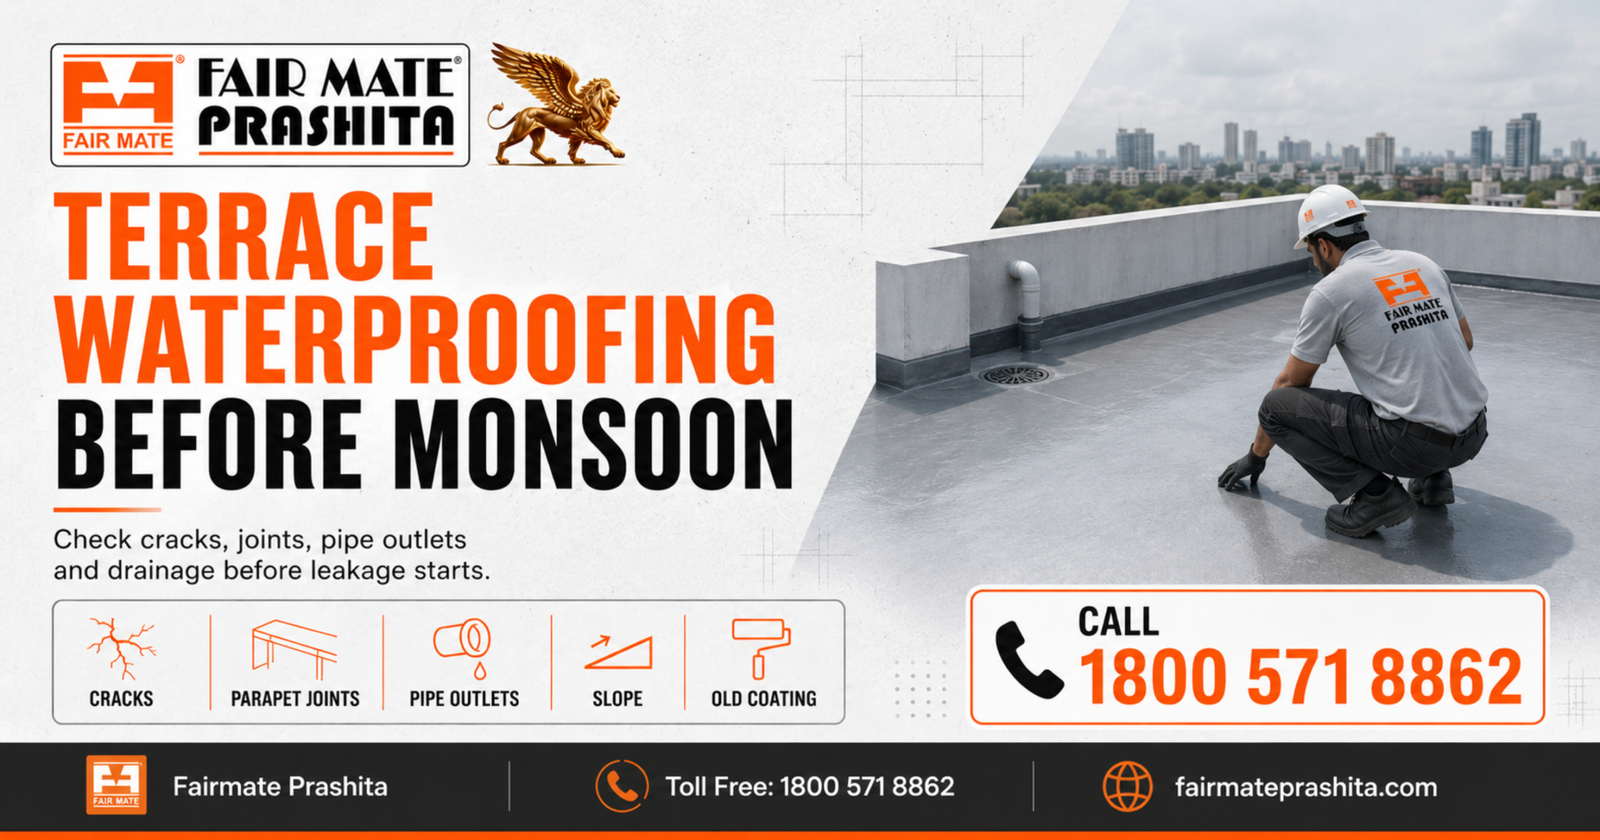
Terrace leakage is one of the most common building problems during monsoon. In many cases, leakage does not start because of heavy rain alone. It starts because small cracks, weak joints, blocked drains or damaged coatings were ignored before the rainy season.

Before monsoon, every terrace should be inspected carefully. A simple visual check can help identify leakage risks before they turn into major seepage, dampness and repair complaints.

For contractors, applicators, builders and homeowners, terrace waterproofing should be planned as a technical process. The focus should be on inspection, surface preparation, crack treatment, joint detailing, slope correction and correct waterproofing product selection.

Why Terrace Waterproofing Should Be Done Before Monsoon

During monsoon, terrace surfaces face continuous rainwater exposure. If water enters through cracks, joints or weak coating areas, it may travel below the surface and appear as ceiling dampness, wall patches, paint peeling or seepage marks.

Once active leakage starts, repair work becomes more difficult because the surface may remain wet and unsuitable for coating. That is why waterproofing inspection and repair should ideally be done before heavy rainfall begins.

Pre-monsoon terrace waterproofing helps reduce:

  • Roof leakage complaints
  • Damp ceiling patches
  • Wall seepage
  • Paint peeling
  • Plaster damage
  • Water stagnation issues
  • Repeat repair cost
  • Customer complaints after handover

Step 1: Check Terrace Surface Cracks

Cracks are one of the first signs of leakage risk. Even small hairline cracks can allow water to enter the surface during repeated rainfall.

Check the terrace for:

  • Hairline cracks
  • Open cracks
  • Shrinkage cracks
  • Cracks near parapet walls
  • Cracks around pipe outlets
  • Cracks near drain areas
  • Cracks in old waterproofing coating

Before applying any waterproofing product, cracks should be treated properly. Applying coating directly over open cracks may not solve the problem because water can continue moving below the membrane.

Step 2: Inspect Parapet Wall Junctions

The junction between terrace floor and parapet wall is a critical leakage point. Many terrace leakage problems start from this corner because rainwater collects near the wall and enters through weak joint areas.

Check whether the wall-floor junction has:

  • Open gaps
  • Poor corner treatment
  • Cracks along the parapet line
  • Damaged old coating
  • Water stagnation near the wall
  • Weak plaster or hollow patches

Proper corner treatment is necessary before waterproofing coating application. In many cases, joint reinforcement or angle treatment may be required depending on site condition.

Step 3: Check Pipe Outlets and Drain Areas

Pipe outlets, drain mouths and rainwater pipes are common weak points in terrace waterproofing. If these areas are not sealed properly, water can enter around the pipe sleeve and travel into the slab or wall.

Before monsoon, check:

  • Drain outlet condition
  • Pipe penetration gaps
  • Loose sealant around pipe areas
  • Water stagnation near drain points
  • Blocked drainage lines
  • Cracks around outlet zones

Even if the main terrace coating is good, leakage can continue if pipe outlet detailing is poor.

Step 4: Check Terrace Slope and Water Stagnation

Waterproofing coating cannot fully compensate for poor slope. If rainwater remains stagnant for long periods, the coating system faces higher stress and leakage risk increases.

Check the terrace after water testing or cleaning. Identify areas where water remains standing.

Common slope problems include:

  • Reverse slope
  • Low spots on roof slab
  • Water ponding near parapet walls
  • Drain outlet placed at wrong level
  • Blocked or insufficient drainage
  • Uneven surface due to old repairs

Correcting slope and drainage is an important part of terrace waterproofing planning.

Step 5: Inspect Old Waterproofing Coating

Many terraces already have some form of old waterproofing layer. Before applying a new coating, check whether the old layer is sound or failing.

Look for:

  • Peeling coating
  • Blisters
  • Cracks in coating
  • Powdery surface
  • Loose patches
  • Exposed concrete
  • Water trapped below coating
  • Previous repair marks

A new waterproofing membrane should not be applied over weak old coating without proper preparation. Loose or damaged material should be removed before new product application.

Step 6: Prepare the Surface Properly

Surface preparation is one of the most important steps in waterproofing. Even a good product may fail if applied over dust, oil, loose particles or weak substrate.

Before applying waterproofing:

  • Clean the surface thoroughly
  • Remove dust, laitance and loose particles
  • Remove oil, grease or contamination
  • Repair cracks and weak patches
  • Treat joints and corners
  • Ensure the surface is suitable for coating
  • Follow product-specific surface condition requirements

Proper surface preparation improves adhesion and supports long-term coating performance.

Step 7: Select the Right WaterGuard System

Terrace waterproofing product selection depends on surface condition, exposure, cracks, slope and application requirement.

WaterGuard Liquid Membrane from Fairmate Prashita can be considered for terrace and roof slab waterproofing where a flexible liquid-applied membrane is required. It is useful for terrace protection when applied over a properly prepared surface with correct detailing and application thickness.

For more demanding waterproofing conditions, other WaterGuard systems may be considered after technical evaluation.

Fairmate Prashita’s waterproofing range includes products such as:

  • WaterGuard Liquid Membrane
  • WaterGuard PU Membrane
  • WaterGuard A
  • WaterGuard AS
  • WaterGuard S
  • Fairmate Nanosil

The right product should be selected based on the leakage problem and site requirement.

Step 8: Follow Correct Application Method

Waterproofing performance depends not only on product selection but also on application control.

During application, contractors should ensure:

  • Correct mixing method where applicable
  • Proper primer or base coat if required
  • Crack and joint treatment before coating
  • Uniform coating thickness
  • Recommended number of coats
  • Correct drying time between coats
  • Protection from rain during curing
  • Final inspection after application

Avoid applying waterproofing coating during active rainfall, over wet surfaces or when the surface is not ready.

Common Terrace Waterproofing Mistakes to Avoid

Avoid these common mistakes before monsoon:

  • Applying coating without surface cleaning
  • Ignoring cracks and joints
  • Skipping pipe outlet treatment
  • Applying product over weak old coating
  • Using the same product for every leakage issue
  • Not checking slope and drainage
  • Applying insufficient coating thickness
  • Not following drying time
  • Ignoring technical guidance for critical areas

These mistakes often lead to repeat leakage complaints.

Final Pre-Monsoon Terrace Checklist

Before monsoon, make sure your terrace is checked for:

  • Cracks
  • Parapet wall junctions
  • Pipe outlets
  • Drainage slope
  • Water stagnation
  • Old coating failure
  • Surface cleanliness
  • Weak plaster or concrete
  • Product suitability
  • Correct application method

A proper waterproofing checklist helps contractors and homeowners prevent small defects from becoming major leakage problems.

Conclusion

Terrace waterproofing before monsoon is not just about applying a coating. It requires proper inspection, crack treatment, joint detailing, slope checking, surface preparation and correct WaterGuard product selection.

WaterGuard waterproofing solutions from Fairmate Prashita help contractors, builders and homeowners select suitable systems for terrace leakage, roof protection, wet areas, basements and surface protection.

Need terrace waterproofing support before monsoon?

Call Fairmate Prashita: 1800 571 8862
Visit: www.fairmateprashita.com

Fairmate Prashita LLP
Advanced construction chemical solutions for waterproofing, concrete repair, grouting, flooring, protective coatings, tile adhesives and admixtures.

best waterproofing product

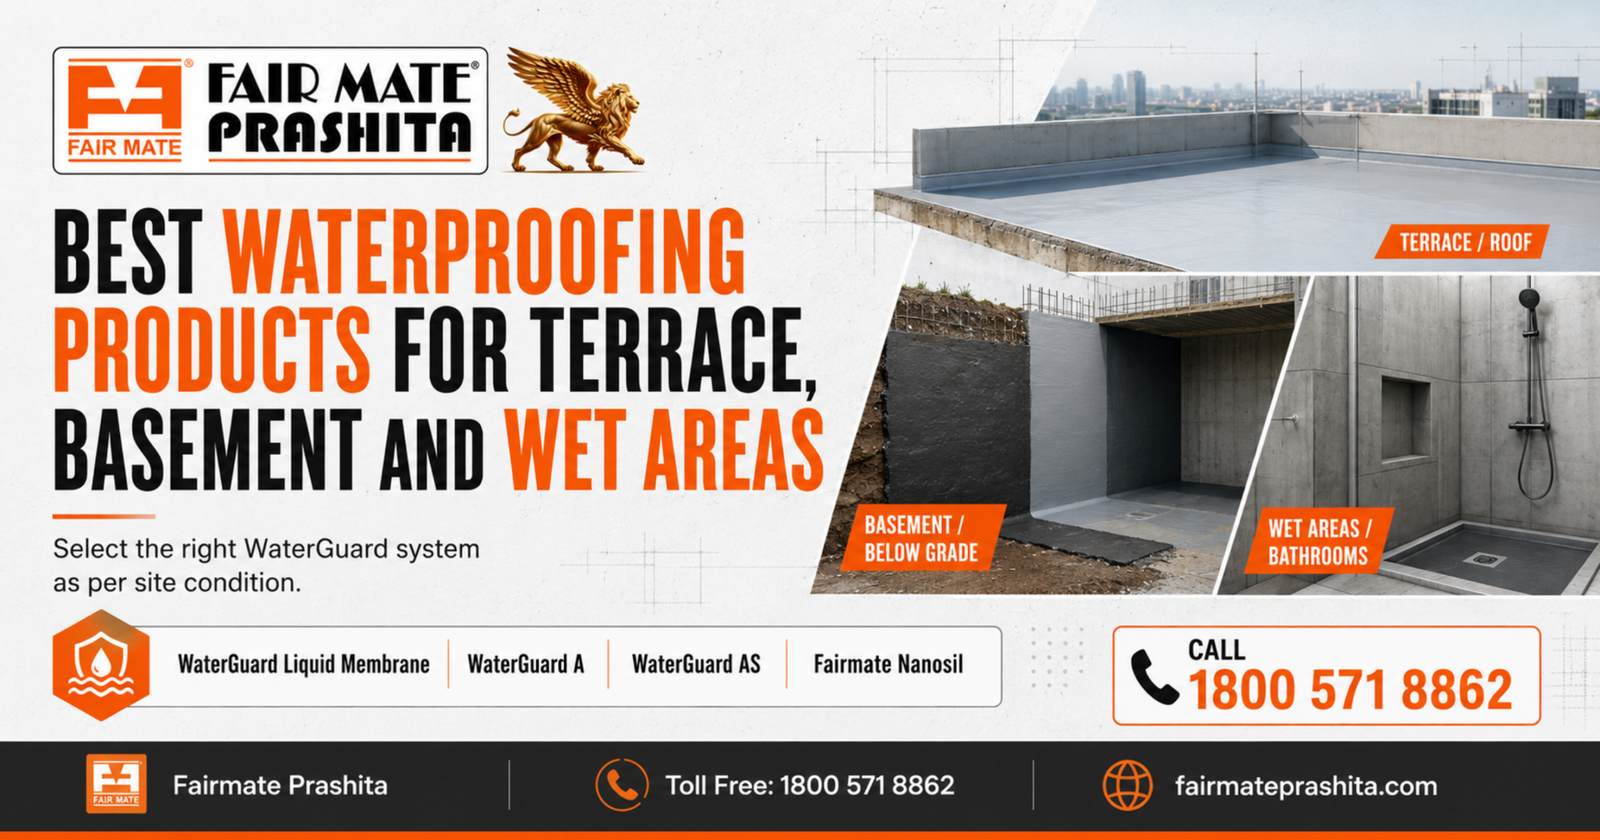
Best Waterproofing Products for Terrace, Basement and Wet Areas

Best Waterproofing Products for Terrace, Basement and Wet Areas.

Water leakage is one of the most common and expensive problems in buildings. Whether it appears as terrace leakage, basement seepage, bathroom dampness, water tank leakage or wall moisture, the actual issue is usually deeper than what is visible on the surface.

Many waterproofing failures happen because the same product is used for every problem. A terrace exposed to sunlight and rain needs a different waterproofing approach compared to a basement wall facing water pressure. A bathroom floor needs proper corner and pipe outlet treatment, while an external wall may need surface protection against rainwater absorption.

For durable results, waterproofing product selection must be based on the application area, substrate condition, leakage source and expected exposure. Fairmate Prashita offers WaterGuard waterproofing systems for different site requirements, helping contractors, builders, engineers and homeowners select the right product for the right problem.

Why Best Waterproofing Products Selection Matters

Waterproofing is not only about applying a coating. It is a complete system that includes surface inspection, crack treatment, joint detailing, slope checking, substrate preparation and correct product application.

Wrong product selection can lead to:

  • Repeat leakage complaints
  • Damp patches on walls and ceilings
  • Peeling paint and plaster damage
  • Coating failure or blistering
  • Water seepage below tiles
  • Corrosion risk in concrete structures
  • Higher repair cost after handover

Before selecting any waterproofing product, the first step is to identify where the water is coming from and how it is entering the structure.

Terrace Best Waterproofing Products

Terraces are directly exposed to sunlight, rain, temperature changes and water stagnation. Common leakage points include surface cracks, parapet wall junctions, pipe outlets, drain areas and failed old coatings.

For terrace waterproofing, a flexible waterproofing membrane is usually preferred because terrace surfaces can experience minor movement and thermal expansion. WaterGuard Liquid Membrane from Fairmate Prashita can be considered for terrace and roof slab waterproofing where a liquid-applied waterproofing membrane is required.

WaterGuard Liquid Membrane helps form a protective waterproofing layer over a properly prepared surface. However, the product should not be applied directly over dusty, weak or cracked surfaces without treatment. Surface preparation plays a major role in final waterproofing performance.

Before applying terrace waterproofing, check:

  • Hairline cracks and open cracks
  • Parapet wall junctions
  • Pipe outlet areas
  • Drainage slope
  • Water stagnation points
  • Old coating condition
  • Surface dust, laitance or loose particles

For terrace applications, the WaterGuard system should be selected after checking the exact exposure, substrate and coating requirement.

Basement Best Waterproofing Products

Basement waterproofing is more technical because water may enter through soil pressure, construction joints, honeycombed concrete, retaining walls or floor-wall junctions. Unlike terrace leakage, basement seepage may involve continuous moisture pressure from outside the structure.

For basement waterproofing, product selection depends on whether the treatment is being done from the positive side or negative side, whether active seepage is present, and whether the concrete surface is sound enough for coating application.

Products such as WaterGuard A and WaterGuard AS may be considered for cementitious waterproofing requirements depending on the site condition. WaterGuard A is used to protect structures against moisture ingress and is applicable in areas such as water tanks, swimming pools, retaining walls, reservoirs, roofs, terraces, balconies, basements and lift shafts. WaterGuard AS is a single-pack polymer-modified flexible cementitious waterproof coating that can be brush-applied to prepared sound substrates.

For basements, a technical inspection is strongly recommended because the wrong system may only hide the problem temporarily. Cracks, construction joints and water pressure conditions must be properly evaluated before product selection.

Wet Area Best Waterproofing Products

Bathrooms, kitchens, utility areas and service zones are common wet areas in buildings. Leakage from these areas often appears on lower floor ceilings, adjacent walls or corners.

Wet area waterproofing usually fails because of poor detailing. Floor-wall corners, pipe penetrations, drain outlets and sunken slab areas are the most critical points.

For wet areas, contractors should check:

  • Floor-wall junctions
  • Drain outlets
  • Pipe sleeves and penetrations
  • Slope towards drain
  • Surface cracks
  • Tile adhesive and grout compatibility
  • Water ponding risk

WaterGuard A or WaterGuard AS may be considered for wet area waterproofing where a cementitious coating system is required. After waterproofing, proper tile adhesive and grouting also become important because water can pass through weak tile joints and reach the substrate below.

Water Tank Best Waterproofing Products

Water tanks need waterproofing products that can handle continuous water contact. Product selection should be done carefully because water tanks are water-retaining structures, and the coating system must be suitable for the purpose.

Before waterproofing a water tank, check:

  • Concrete surface strength
  • Honeycombing or voids
  • Wall-floor junctions
  • Pipe penetrations
  • Internal cracks
  • Leakage path
  • Surface cleanliness

WaterGuard A can be considered for water-retaining structures depending on technical suitability and application guidance. For water tanks, always follow product technical data sheet recommendations and avoid using general-purpose coating products without confirmation.

External Wall Dampness and Surface Protection

External wall dampness is often caused by rainwater absorption through porous plaster, cracks, weak paint film or open joints. In many cases, homeowners apply paint repeatedly, but dampness returns because the wall surface continues absorbing moisture.

For suitable porous external surfaces, Fairmate Nanosil can be considered as a penetrating water-repellent treatment. It is a clear, water-soluble penetrating sealer based on organo-silane nanotechnology. It penetrates into the substrate and becomes part of the structure.

Fairmate Nanosil is useful where the main issue is rainwater absorption through porous surfaces. However, if dampness is caused by terrace leakage, plumbing leakage or structural cracks, the root cause must be treated first.

How to Select the Right WaterGuard Product

Use this basic selection checklist before choosing a waterproofing product:

  1. Identify the leakage source
  2. Check whether the area is terrace, basement, tank, wet area or wall
  3. Inspect cracks and construction joints
  4. Check surface strength and cleanliness
  5. Identify water pressure condition
  6. Check if the surface is exposed to sunlight
  7. Confirm whether coating flexibility is required
  8. Treat weak areas before product application
  9. Follow recommended coating thickness
  10. Take technical guidance for critical sites

A waterproofing product should never be selected only by price or availability. The right system depends on performance requirement and site condition.

Fairmate Prashita WaterGuard Product Direction

Fairmate Prashita offers a wide waterproofing range for different construction requirements:

  • WaterGuard Liquid Membrane for terrace and roof waterproofing support
  • WaterGuard PU Membrane for elastomeric waterproofing protection
  • WaterGuard A for cementitious waterproofing applications
  • WaterGuard AS for flexible cementitious waterproofing coating
  • WaterGuard S for acrylic-based waterproof coating requirements
  • Fairmate Nanosil for surface water-repellent protection

Each product has a specific purpose, and the correct choice should be made after checking the application area and site condition.

Conclusion

The best waterproofing product is not the same for every area. Terraces need flexibility and exposure resistance. Basements need protection against seepage and water pressure. Wet areas need careful corner and pipe outlet treatment. Water tanks need suitable systems for water-retaining structures. External walls may need surface water repellency.

For durable waterproofing, focus on correct diagnosis, surface preparation, product selection and controlled application.

Need help selecting the right waterproofing product for your site?

Call Fairmate Prashita for waterproofing support: 1800 571 8862

Visit: www.fairmateprashita.com

Fairmate Prashita LLP
Advanced construction chemical solutions for waterproofing, concrete repair, grouting, flooring, protective coatings, tile adhesives and admixtures.

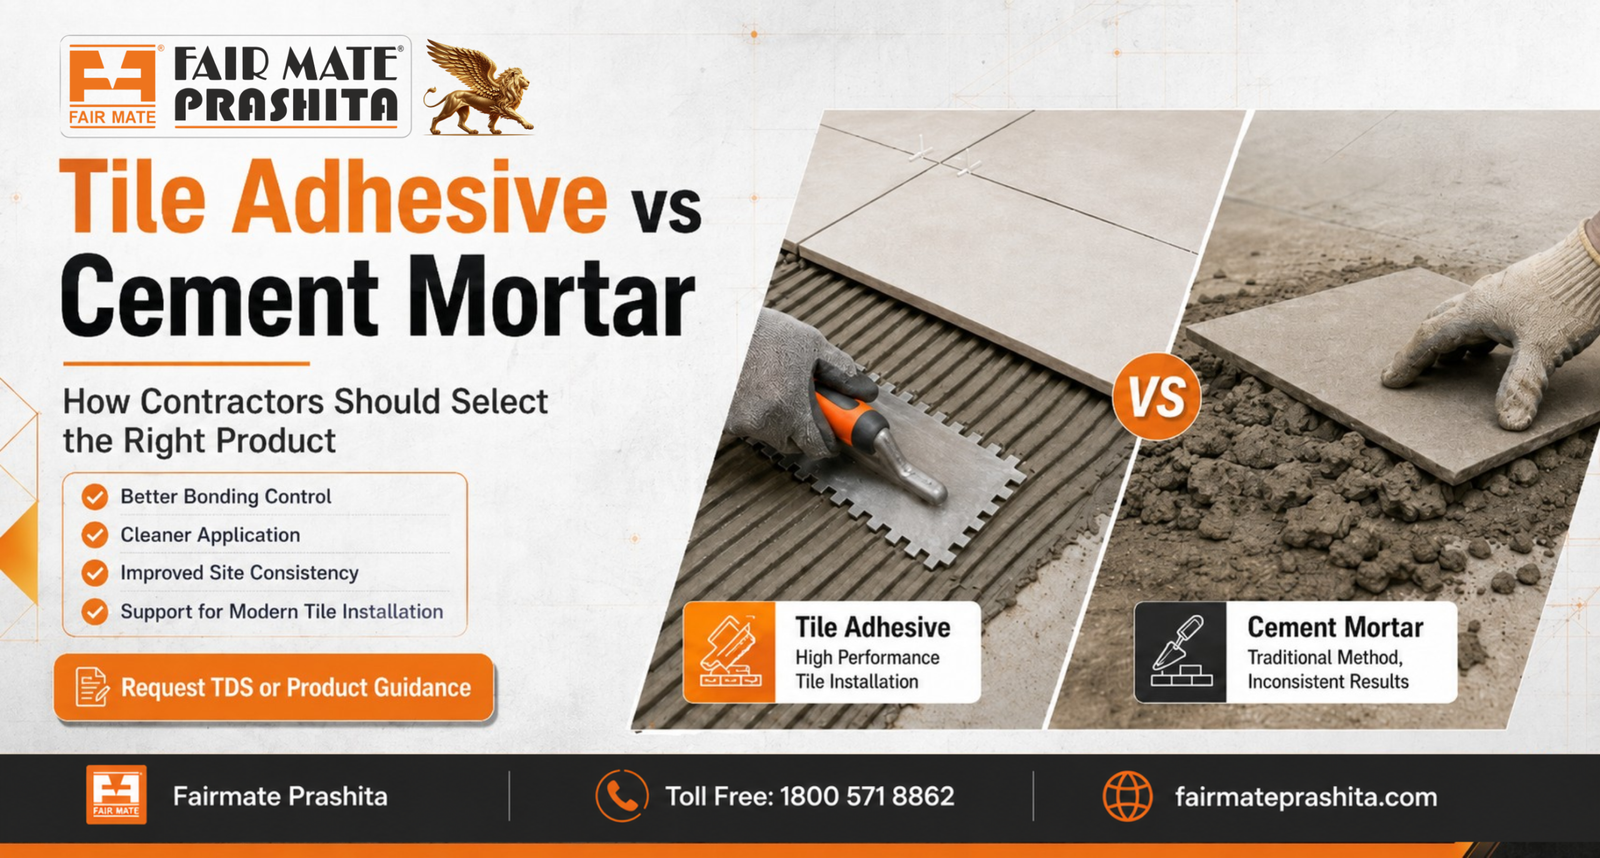
Avoid debonding with the right adhesive selection and application method. FairFix Tile Adhesive Solutions Fairmate Prashita | 1800 571 8862

Common Tile Fixing Mistakes That Cause Debonding and How to Avoid Them

Common tile Fixing Mistakes That Cause Debonding and How to Avoid Them

Tile debonding is one of the most common complaints in tile installation work. A tile may look properly fixed on the first day, but after some time, problems such as hollow sound, loose tiles, cracked joints, water seepage, uneven levels or complete tile failure may appear.

In many cases, the problem is not only with the tile. The real reason is often poor surface preparation, wrong adhesive selection, incorrect mixing, improper bedding or careless application technique.

For contractors, applicators, builders and dealers, understanding these mistakes is important because tile fixing quality directly affects project finish, customer satisfaction and long-term site performance.

Fairmate Prashita’s FairFix tile adhesive and mortar solutions are designed to support better bonding, cleaner application and more controlled site work when used with the right application method.

Why Tile Debonding Happens

Tile debonding means the tile loses proper bond with the surface below it. This can happen on floors, walls, bathrooms, kitchens, balconies, commercial spaces and renovation projects.

Common signs of tile debonding include:

  • Hollow sound when tapping tiles
  • Loose or lifted tiles
  • Cracked grout joints
  • Tile edges opening
  • Water entering below the tile
  • Uneven tile level
  • Repeated repair complaints

Debonding usually happens when the adhesive layer does not create strong contact between the tile and the substrate. This can happen due to product selection mistakes or application mistakes.

Mistake 1: Poor Surface Preparation

Surface preparation is one of the most important steps in tile fixing. If the surface is dusty, oily, weak, uneven or loose, the adhesive will not bond properly.

Many applicators start tile fixing without checking whether the surface is clean and sound. This can reduce bonding strength and create future tile failure.

How to Avoid It

Before applying tile adhesive:

  • Remove dust and loose particles
  • Clean oil, grease or paint contamination
  • Repair weak or damaged areas
  • Check surface level
  • Ensure the substrate is strong and stable
  • Avoid applying adhesive on loose plaster or weak screed

A clean and strong surface gives the tile adhesive better contact and improves bonding performance.

Mistake 2: Using Cement Mortar for Every Tile Application

Traditional cement-sand mortar is still used on many sites, but modern tiles and modern construction requirements need better bonding control. Cement mortar quality depends on site mixing, sand quality, water addition and workmanship. These factors can vary from site to site.

For vitrified tiles, large tiles, wet areas, renovation work or commercial projects, relying only on conventional mortar may not give the desired performance.

How to Avoid It

Use the right tile adhesive system based on tile type, tile size and application area. FairFix tile adhesive solutions from Fairmate Prashita support better bonding control, cleaner application and more consistent site performance compared to uncontrolled site mixing.

For routine tile fixing, FairFix TA STD can be considered as a practical tile adhesive solution. For higher-performance requirements, upgraded FairFix adhesive options may be recommended after technical guidance.

Mistake 3: Adding Too Much Water During Mixing

Excess water is a common mistake during tile adhesive preparation. Applicators sometimes add extra water to make the paste more workable. However, too much water can weaken the adhesive mix and affect bonding performance.

A watery mix may look easy to apply, but it can reduce strength, increase shrinkage and create poor tile contact.

How to Avoid It

Always follow the recommended water ratio given in the product technical data sheet. Add powder slowly into clean water and mix until a smooth, lump-free paste is formed.

Avoid:

  • Adding water again and again
  • Making the mix too thin
  • Using dirty water
  • Mixing without proper consistency
  • Using material after its workable time

Correct mixing supports better adhesive performance and easier application.

Mistake 4: Not Using a Notched Trowel

Using a flat trowel only or applying adhesive unevenly can create poor bedding below the tile. Without proper ridges, the tile may not get full contact with the adhesive bed.

This can lead to hollow sound, weak bonding and future debonding.

How to Avoid It

Use a suitable notched trowel based on tile size and surface condition. First spread the adhesive with the flat side of the trowel, then comb it using the notched side.

This helps create uniform adhesive ridges and improves tile contact when the tile is pressed properly.

Mistake 5: Spreading Too Much Adhesive at Once

Tile adhesive has an open time. If adhesive is spread over a large area and tiles are not placed quickly, the surface of the adhesive may start drying. Once this happens, bonding performance can reduce.

This mistake is common on large floor areas where applicators try to cover more area quickly.

How to Avoid It

Apply adhesive only on the area that can be tiled within the recommended open time. Avoid spreading adhesive too far ahead of tile placement.

Work in smaller sections and keep checking adhesive freshness before placing tiles.

Mistake 6: Poor Tile Contact

After placing the tile, it must be pressed properly into the adhesive bed. If the tile is only placed lightly without proper pressure and movement, full contact may not happen.

Poor contact creates empty areas below the tile. These areas can later cause hollow sound or tile breakage under load.

How to Avoid It

After placing the tile:

  • Press it firmly
  • Move slightly to ensure contact
  • Use spacers for uniform joints
  • Check tile level
  • Lift one tile occasionally to confirm adhesive coverage
  • Avoid leaving voids below the tile

Proper tile contact is critical for strong bonding and long-term performance.

Mistake 7: Ignoring Tile Type and Tile Size

Every tile is not the same. Ceramic tiles, vitrified tiles, large-format tiles, glass mosaics and stone tiles can have different bonding requirements.

Using the same adhesive or same method for every tile type can create performance issues.

How to Avoid It

Before starting tile work, check:

  • Tile size
  • Tile weight
  • Tile back surface
  • Water absorption
  • Application area
  • Interior or exterior exposure
  • Floor or wall use
  • Wet or dry area

Select the FairFix tile adhesive grade based on the actual site requirement. For routine work, FairFix TA STD may be suitable. For more demanding applications, ask for technical guidance before product selection.

Mistake 8: Applying on Uneven Surface

If the substrate is uneven, applicators may try to correct the level using extra adhesive thickness. This can create uneven drying, poor bedding and weak performance.

Tile adhesive should not be used as a replacement for proper surface levelling unless the product recommendation allows it.

How to Avoid It

Correct major surface unevenness before tile fixing. Ensure the substrate is properly levelled, cured and prepared before applying adhesive.

A level surface improves adhesive coverage, tile alignment and finish quality.

Mistake 9: Early Grouting or Early Loading

Grouting too early or allowing foot traffic before the adhesive has set properly can disturb the tile bond. This can cause movement, joint cracks or weak bonding.

How to Avoid It

Allow proper setting time before grouting or loading the tiled area. Follow the product recommendation for setting time and grouting time.

Avoid rushing the process, especially in areas where performance and finish are important.

Mistake 10: Not Taking Product Guidance

Many site problems happen because the same product is used for all applications without technical checking. For example, bathroom tiles, swimming pool tiles, external cladding, tile-on-tile work and heavy traffic areas may need different adhesive performance.

How to Avoid It

Before selecting tile adhesive, contractors and dealers should take product guidance based on tile type, surface and application area.

Fairmate Prashita provides technical support to help select the right FairFix solution for site requirements.

How FairFix Tile Adhesive Solutions Help

FairFix tile adhesive and mortar products are designed to support practical site performance for contractors, applicators and builders.

FairFix solutions can help with:

  • Better tile bonding support
  • Cleaner site application
  • Prepacked product consistency
  • Easy mixing and application
  • Reduced dependence on uncontrolled site mixing
  • Contractor-friendly use
  • Product selection support for different applications

For everyday tile fixing, FairFix TA STD can be positioned as a practical adhesive option. FairFix Mortar can support routine tile fixing and mortar work. For demanding applications, higher-grade FairFix solutions can be recommended after technical evaluation.

Basic Correct Tile Adhesive Application Method

For better bonding, follow these basic steps:

  1. Clean the surface properly.
  2. Remove dust, oil, grease and loose material.
  3. Check whether the surface is level and strong.
  4. Mix FairFix tile adhesive with clean water as recommended.
  5. Avoid adding excess water.
  6. Use a notched trowel for adhesive application.
  7. Apply adhesive only within workable area.
  8. Press tiles properly into the adhesive bed.
  9. Use spacers and check level.
  10. Clean excess adhesive before hardening.
  11. Allow proper setting before grouting or loading.

Correct product selection and correct application both are necessary for durable tile fixing.

Conclusion

Tile debonding is not a small issue. It can lead to repair cost, customer complaints, site delays and loss of trust. Most debonding problems can be reduced by avoiding common tile fixing mistakes and using the right adhesive system.

Contractors should not depend only on traditional methods for every tile application. Modern tile fixing needs better surface preparation, correct mixing, proper bedding and suitable tile adhesive selection.

FairFix tile adhesive and mortar products from Fairmate Prashita help contractors, applicators, builders and dealers choose a more controlled and reliable solution for tile bonding work.

Need help selecting the right FairFix product for your site?

Call Fairmate Prashita for product guidance: 1800 571 8862
Visit: www.fairmateprashita.com

FairFix tile adhesive, FairFix TA STD

FairFix Tile Adhesive Guide: Uses, Benefits and Application Selection

FairFix Tile Adhesive Guide: Uses, Benefits and Application Selection

Tile installation quality depends on more than tile selection. The bonding material behind the tile plays a major role in long-term performance, finish quality, site speed and customer satisfaction. For many years, contractors have used traditional cement-sand mortar for tile fixing. However, modern construction sites now demand better bonding control, cleaner application and more consistent results.

This is where FairFix tile adhesive and mortar products from Fairmate Prashita help contractors, builders, applicators and dealers choose a more reliable tile fixing system.

FairFix tile adhesive solutions are designed to support practical site requirements such as better adhesion, ease of use, controlled application and dependable bonding performance for different tile fixing needs.

Why Tile Adhesive Selection Matters

Tile debonding, hollow sound, uneven tile levels, cracked joints and repair complaints are often linked to incorrect bonding material or poor application practices. In many cases, the tile itself is not the problem. The issue starts with the adhesive selection, substrate condition, mixing method or application technique.

Traditional cement-sand mortar is commonly mixed at site. Its final quality depends on cement quality, sand grading, water addition, batching ratio and workmanship. These factors are not always controlled properly on active construction sites.

Prepacked tile adhesive systems help reduce this uncertainty. Since the product is factory-controlled, contractors get better consistency compared to site-mixed mortar. Fairmate Prashita’s FairFix range is developed to support contractors with practical tile bonding solutions for different site requirements.

What Is FairFix Tile Adhesive?

FairFix tile adhesive is a cementitious tile fixing solution used for bonding tiles to prepared substrates. Depending on the product grade, it can be used for ceramic tiles, vitrified tiles, internal areas, external areas, wet areas, tile-on-tile applications and other site conditions after proper product selection.

Fairmate Prashita’s FairFix range includes options such as FairFix Mortar, FairFix TA STD and FairFix TA Ultra. These products help contractors select the right tile adhesive based on tile type, surface condition and application requirement.

FairFix Mortar: General Tile Fixing Support

FairFix Mortar is suitable for contractors and masons who need a practical tile fixing mortar for routine site applications. It offers a more controlled alternative to conventional cement-sand fixing.

Key advantages include:

  • Fast and efficient use
  • Easy mixing with water
  • Better bonding strength
  • Thinner application layer
  • Cleaner site application
  • Prepacked product consistency
  • Useful for ceramic and vitrified tile fixing

FairFix Mortar can help reduce the uncertainty of site mixing and support more dependable tile bonding when applied correctly on prepared surfaces.

FairFix TA STD: Practical Tile Adhesive for Everyday Site Work

FairFix TA STD is a strong product choice for everyday tile fixing requirements. It is suitable for contractors, builders, applicators and dealers who need a practical adhesive system for regular tile installation work.

FairFix TA STD supports:

  • Better tile bonding
  • Improved workability
  • Consistent application quality
  • Contractor-friendly use
  • Controlled tile fixing compared to conventional mortar
  • Cleaner and faster site work

For routine residential, commercial and contractor-led tile fixing projects, FairFix TA STD can be positioned as a dependable tile adhesive solution.

FairFix TA Ultra: For Higher-Performance Tile Fixing Needs

For demanding tile fixing applications, contractors may require a higher-performance tile adhesive. FairFix TA Ultra is described by Fairmate Prashita as a polymer-rich cementitious tile adhesive for thin or thick bed fixing of ceramic tiles in interior or exterior situations. It provides strong adhesion to cement-sand screeds, concrete and brickwork, and can also be suitable for substrates such as glazed tiles, terrazzo and suitably prepared timber.

FairFix TA Ultra benefits include:

  • High adhesive bond strength
  • Excellent waterproofing characteristics
  • Non-slip and excellent grab properties
  • Excellent tensile strength
  • Prepacked factory-controlled quality
  • Easy-to-use application
  • Waterproof immersion does not affect adhesion

FairFix TA Ultra may be considered for applications like tile-on-tile fixing, bathrooms, kitchens, swimming pools, glass mosaics, laboratories, canteens and other demanding areas where suitable after technical evaluation.

Benefits of Using FairFix Tile Adhesive

1. Better Bonding Strength

Tile adhesive is designed to improve the bond between tile and substrate. This helps reduce risks such as loose tiles, hollow sound and early debonding when surface preparation and application are done correctly.

2. Controlled Product Quality

FairFix tile adhesives are prepacked systems. This reduces dependence on uncontrolled site batching and helps provide more consistent material quality.

3. Cleaner Application

Tile adhesive is generally easier to apply using proper tools such as a notched trowel. This supports cleaner work, better spreading and improved tile contact.

4. Faster Site Execution

Because the product is ready to mix with water, it saves time compared to collecting, measuring and mixing cement and sand at site.

5. Thinner Application Layer

Compared to conventional thick-bed mortar, tile adhesive can often be applied in a thinner layer, depending on tile type, substrate level and product recommendation.

6. Suitable for Modern Tile Requirements

Modern tiles may have low water absorption, larger formats or smoother backs. These conditions require better adhesive support than traditional mortar in many applications.

Where FairFix Tile Adhesive Can Be Used

FairFix tile adhesive solutions can be considered for:

  • Residential flooring
  • Commercial flooring
  • Internal wall tiles
  • Bathroom tiles
  • Kitchen tiles
  • Ceramic tile fixing
  • Vitrified tile fixing
  • Renovation tile work
  • Contractor-led site applications
  • Dealer and applicator projects

For special applications such as external cladding, swimming pools, tile-on-tile or large-format tiles, contractors should take proper product guidance before selection.

How to Select the Right FairFix Product

Choosing the right tile adhesive depends on the site requirement. Contractors should check these points before selection:

1. Tile Type

Ceramic, vitrified, mosaic, stone, glass mosaic or large-format tiles may require different adhesive grades.

2. Tile Size

Larger tiles need better contact and bonding support. Product selection should match tile size and application area.

3. Surface Condition

The substrate should be sound, clean, level and free from dust, oil, grease or loose particles.

4. Application Area

Bathrooms, kitchens, balconies, swimming pools, external areas and commercial spaces may need higher adhesive performance.

5. Site Requirement

Routine tile fixing may be suitable with FairFix Mortar or FairFix TA STD, while demanding conditions may require upgraded FairFix adhesive options.

Basic Application Guidelines

Correct application is as important as product selection. Contractors should follow these basic steps:

  1. Clean the substrate properly.
  2. Remove dust, oil, grease and loose material.
  3. Mix the adhesive with clean water as recommended.
  4. Use a slow-speed mixer if available to avoid lumps.
  5. Allow proper mixing and resting time where recommended.
  6. Apply adhesive with a suitable notched trowel.
  7. Press and align tiles properly.
  8. Ensure full tile contact with the adhesive bed.
  9. Avoid applying more adhesive than can be tiled within open time.
  10. Follow recommended curing and grouting timelines.

For best results, always refer to the product technical data sheet and take technical guidance where required.

Common Tile Fixing Mistakes to Avoid

  • Using one product for every tile type
  • Applying tiles on dusty or weak surfaces
  • Adding excess water during mixing
  • Using improper trowel size
  • Not achieving full tile contact
  • Ignoring open time
  • Fixing tiles on uneven surfaces without correction
  • Using cement mortar where tile adhesive is required
  • Skipping product guidance for wet or external areas

Avoiding these mistakes can improve tile bonding performance and reduce site complaints.

Why Contractors and Dealers Should Promote FairFix

FairFix tile adhesive and mortar products are practical for contractor sales because they solve real site problems. Dealers can position FairFix products as a better tile fixing solution for customers who want reliable bonding, cleaner application and improved workability.

For contractors, FairFix supports better site confidence. For builders, it supports quality control. For dealers, it creates a clear product category with repeat demand.

Conclusion

Conclusion: Adhesive Selection as a Performance‑Critical Decision Tile adhesive choice directly determines tile service life, finish quality, installation speed, and customer satisfaction. Conventional cement–sand mortar often lacks the bonding control, dimensional stability, and workability required for modern tile formats and substrates.

Need help selecting the right FairFix product for your site?

Call Fairmate Prashita for product guidance: 1800 571 8862
Visit: www.fairmateprashita.com

concrete-repair-chemicals

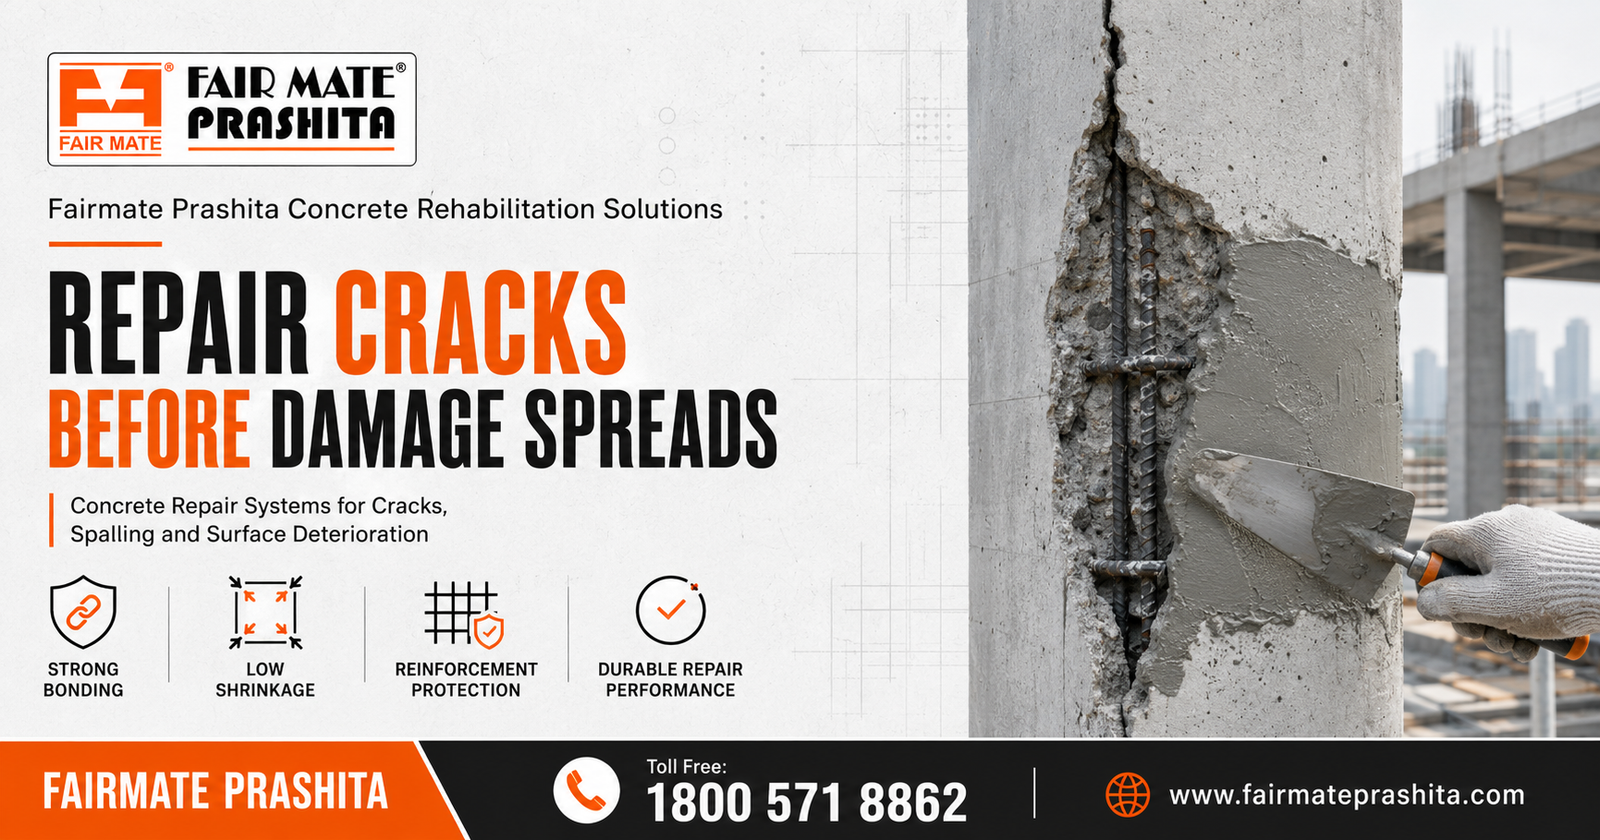
Concrete Repair Chemicals: How to Repair Cracks and Spalling

Concrete is one of the most durable construction materials, but it can still get damaged due to structural movement, water ingress, corrosion, poor workmanship, chemical exposure, carbonation, impact damage or long-term weathering. Two of the most common concrete repair problems seen on sites are cracks and spalling, raises need of Concrete Repair Chemicals.

Small cracks may look minor in the beginning, but if they are ignored, they can allow moisture, chlorides and carbon dioxide to enter the concrete. Over time, this can affect reinforcement, reduce durability and increase repair costs. Spalling is another serious issue where the concrete surface breaks, flakes or comes off, often exposing steel reinforcement.

The right concrete repair chemicals help restore surface integrity, improve bonding, protect reinforcement and extend the service life of the structure. However, repair success depends on proper inspection, surface preparation, product selection and application method.

What Causes Cracks in Concrete?

Concrete cracks can happen due to many reasons. Some cracks are non-structural, while others may indicate deeper structural or durability issues. Before selecting a repair material, the cause of cracking should be understood.

Common causes of concrete cracks include:

  • Drying shrinkage
  • Thermal movement
  • Structural loading
  • Settlement
  • Poor curing
  • Water leakage
  • Corrosion of reinforcement
  • Poor concrete mix or compaction
  • Construction joint movement
  • Chemical or weather exposure

Not every crack needs the same repair method. A hairline crack on a plastered surface, a leakage crack on a terrace, and a structural crack in a beam or column may require different repair systems.

What Is Concrete Spalling?

Concrete spalling happens when the surface layer of concrete breaks, chips, flakes or separates from the main body of concrete. It is commonly seen on slabs, columns, beams, balconies, basements, parking areas, industrial floors and exposed concrete structures.

Spalling may occur due to:

  • Corrosion of reinforcement
  • Water ingress
  • Carbonation
  • Chloride attack
  • Freeze-thaw damage in cold regions
  • Impact or abrasion
  • Low cover to reinforcement
  • Poor quality concrete
  • Poor compaction or honeycombing
  • Chemical exposure

When reinforcement starts corroding, rust expands and creates internal pressure. This pressure can push the surrounding concrete outward, causing cracks and spalling. If this is not repaired correctly, the damage can spread further.

Why Concrete Repair Chemicals Are Important

Concrete repair is not only about filling a visible gap or covering damaged concrete. A good repair system should support bonding, strength, durability, protection and compatibility with the existing structure.

Concrete repair chemicals are used to:

  • Fill cracks and voids
  • Repair spalled concrete
  • Restore damaged surfaces
  • Improve bonding between old and new concrete
  • Protect reinforcement from corrosion
  • Reduce water ingress
  • Improve surface durability
  • Support long-term concrete rehabilitation

Using ordinary cement mortar for all repair work may not provide the required bonding, shrinkage control or durability. Purpose-designed concrete repair products are often needed for long-term performance.

Step-by-Step Approach to Repair Cracks and Spalling

1. Inspect the Damage

The first step is inspection. Check whether the damage is limited to the surface or connected to a deeper structural issue. Identify the type of crack, crack width, location, leakage condition, reinforcement exposure and surrounding concrete quality.

For spalling, check whether reinforcement is exposed, corroded or loose. Also inspect whether the concrete around the damaged area is sound or weak.

Important inspection points include:

  • Crack width and depth
  • Active or inactive crack movement
  • Water seepage or leakage
  • Hollow or loose concrete
  • Reinforcement corrosion
  • Surface contamination
  • Chemical exposure
  • Load-bearing condition

If the damage is structural, a qualified engineer should evaluate it before repair.

2. Remove Loose and Damaged Concrete

For spalling repair, all loose, weak and delaminated concrete must be removed. Repair should not be done over unsound concrete because it can affect bonding and durability.

The repair area should be cut or prepared properly so the repair mortar can bond with a stable substrate. Exposed reinforcement should be cleaned and treated before applying repair material.

Surface preparation may include:

  • Chipping loose concrete
  • Removing dust and laitance
  • Cleaning rust from reinforcement
  • Removing oil, grease and contaminants
  • Creating a firm and clean repair edge
  • Washing and drying the surface as required

Good surface preparation is one of the most important factors in repair success.

3. Treat Reinforcement if Required

If steel reinforcement is exposed or corroded, it should be cleaned properly. Rust, loose scale and contaminants must be removed. Depending on project requirement, an anti-corrosion coating or reinforcement protection system may be applied.

This step is important because untreated reinforcement corrosion can continue even after surface repair. If corrosion is active, the repair may fail early.

4. Select the Right Repair Material

Different repair conditions require different repair products. The repair material should be selected based on repair thickness, structural requirement, exposure condition, application method and required strength.

Common types of concrete repair chemicals include:

  • Polymer modified repair mortar
  • High strength repair mortar
  • Micro concrete
  • Epoxy repair mortar
  • Crack filling compounds
  • Injection grouts
  • Bonding agents
  • Anti-corrosion coatings
  • Protective coatings

For small non-structural surface cracks, crack filling material may be suitable. For spalling, polymer modified repair mortar or structural repair mortar may be required. For deeper repairs or congested reinforcement areas, micro concrete may be considered.

5. Apply Bonding Agent or Primer

In many repair applications, bonding between old concrete and new repair material is critical. A suitable bonding agent or primer may be used to improve adhesion.

The bonding system should be compatible with the repair mortar and substrate condition. Application should follow the recommended method, because improper timing or poor surface condition can affect bonding.

6. Apply Repair Mortar or Repair System

After surface preparation and bonding treatment, the selected repair mortar can be applied. The material should be placed properly into the repair area without leaving voids.

For vertical and overhead repairs, the repair mortar should have suitable build-up properties. For larger repairs, layer-by-layer application may be required.

Key points during application:

  • Mix the product in the correct ratio
  • Avoid excess water addition
  • Apply within working time
  • Compact the material properly
  • Maintain required repair thickness
  • Finish the surface as per requirement
  • Cure the repair area properly

Incorrect mixing or poor application can reduce performance.

7. Cure and Protect the Repaired Area

Curing is important for cementitious repair mortars. Proper curing helps strength development and reduces shrinkage-related problems.

After repair, the surface may also require protective coating depending on exposure condition. For example, exposed concrete surfaces, industrial structures, basements, parking areas or coastal structures may need additional protection from moisture, carbonation, chemicals or weathering.

Common Mistakes in Concrete Repair

Concrete repair failure often happens because of poor preparation or wrong product selection. Some common mistakes include:

  • Filling cracks without identifying the cause
  • Applying repair mortar over loose concrete
  • Ignoring reinforcement corrosion
  • Using ordinary cement mortar for all repairs
  • Poor surface cleaning
  • Adding excess water to repair mortar
  • Not using bonding agent where required
  • Ignoring curing
  • Not protecting the repaired surface from future exposure

A repair should be planned as a system, not as a temporary patch.

How to Select Concrete Repair Chemicals

When selecting concrete repair chemicals, consider these factors:

  • Type of damage: crack, spalling, honeycombing or surface erosion
  • Structural or non-structural repair requirement
  • Repair depth and thickness
  • Exposure to water, chemicals or weather
  • Reinforcement condition
  • Required strength and durability
  • Application area: horizontal, vertical or overhead
  • Compatibility with existing concrete
  • Need for protective coating after repair

Correct product selection helps improve repair life and reduces repeat maintenance.

Fairmate Prashita Concrete Repair Support

Fairmate Prashita offers concrete repair solutions for cracks, spalling, damaged concrete surfaces, repair mortars, bonding support and concrete rehabilitation applications.

Our concrete repair approach focuses on:

  • Proper surface preparation
  • Strong bonding
  • Low shrinkage repair
  • Durable repair performance
  • Reinforcement protection support
  • Long-term concrete rehabilitation

Fairmate Prashita supports engineers, contractors, consultants and maintenance teams with product guidance for concrete repair and protection requirements.

Conclusion

Concrete cracks and spalling should not be ignored. Even small visible damage can become a larger durability issue if moisture and aggressive agents enter the concrete. Successful repair requires proper inspection, removal of damaged concrete, reinforcement treatment, correct repair material selection, bonding support, careful application and curing.

The right concrete repair chemicals help restore damaged surfaces, improve durability and protect the structure for long-term performance.

For concrete repair system guidance, connect with Fairmate Prashita.

Explore repair systems:
Call: 1800 571 8862
Website: www.fairmateprashita.com

Epoxy flooring for warehouses & Factories

Epoxy Flooring for Warehouses and Factories: Complete Selection Guide

Warehouse and factory floors are exposed to continuous movement, heavy loads, machinery, forklifts, pallet trucks, chemicals, oil stains, dust, abrasion, and regular cleaning. A weak or untreated concrete floor can quickly become dusty, uneven, stained, and difficult to maintain.

This is why epoxy flooring for Warehouses has become one of the most preferred industrial flooring solutions for warehouses, factories, production units, logistics centers, workshops, and commercial industrial spaces. A properly selected epoxy flooring system can improve surface durability, hygiene, maintenance, appearance, and long-term floor performance.

Fairmate Prashita provides industrial flooring solutions designed to support factory owners, architects, engineers, contractors, and project teams in selecting the right flooring system based on actual site conditions.


Why Flooring Selection Matters in Warehouses and Factories

Industrial floors are not just walking surfaces. They directly affect productivity, safety, movement, cleaning, and maintenance cost.

In warehouses and factories, poor flooring may lead to:

  • Concrete dusting
  • Surface wear and abrasion
  • Cracks and uneven patches
  • Difficult cleaning
  • Staining from oil or chemicals
  • Reduced floor life
  • Maintenance shutdowns
  • Poor appearance of the facility

A suitable epoxy flooring system helps protect the concrete substrate and creates a stronger, cleaner, and more professional floor surface.


What Is Epoxy Flooring?

Epoxy flooring is a resin-based flooring system applied over prepared concrete surfaces. It forms a seamless, hard-wearing, and durable protective layer that improves the performance of the floor.

Epoxy flooring is commonly used in:

  • Warehouses
  • Factories
  • Manufacturing units
  • Food processing areas
  • Pharmaceutical facilities
  • Automobile workshops
  • Logistics centers
  • Industrial plants
  • Parking and service areas
  • Heavy-duty movement zones

Depending on the site requirement, the epoxy system may vary in thickness, finish, chemical resistance, anti-skid properties, and load-bearing performance.


Key Benefits of Epoxy Flooring for Warehouses and Factories

1. High Traffic Resistance

Warehouses and factories face regular movement of workers, trolleys, forklifts, and material handling equipment. Epoxy flooring helps create a durable surface that can withstand industrial traffic better than untreated concrete.

2. Dust-Free Surface

Concrete dusting is a common issue in industrial floors. Epoxy flooring helps seal the surface and reduce dust generation, making the area cleaner and easier to maintain.

3. Easy Cleaning and Maintenance

A seamless epoxy floor reduces dirt accumulation and allows easier cleaning. This is especially useful for factories, production units, warehouses, and facilities where hygiene and appearance matter.

4. Improved Durability

Epoxy flooring improves surface resistance against abrasion, impact, and general wear. This helps reduce frequent repair and maintenance requirements.

5. Better Floor Appearance

A finished epoxy floor gives a clean, smooth, and premium industrial appearance. It improves the overall look of warehouses, factories, and commercial workspaces.

6. Chemical and Stain Resistance

Many industrial areas are exposed to oils, chemicals, lubricants, and cleaning agents. Depending on the epoxy system selected, the floor can provide better resistance against stains and chemical exposure.


How to Select the Right Epoxy Flooring System

Choosing epoxy flooring should not be based only on appearance. The system must be selected according to the actual use of the area.

1. Understand the Traffic Load

First, identify the type of movement on the floor:

  • Foot traffic
  • Trolley movement
  • Forklift movement
  • Heavy machinery
  • Pallet truck movement
  • Static equipment load

High-load areas require stronger and more durable flooring systems.

2. Check the Condition of Existing Concrete

Before applying epoxy flooring, the concrete surface must be inspected properly. Important checks include:

  • Surface strength
  • Cracks
  • Dusting
  • Oil contamination
  • Moisture level
  • Uneven surface
  • Existing coating condition

A weak or contaminated surface may affect bonding and long-term performance.

3. Consider Surface Preparation

Surface preparation is one of the most important steps in epoxy flooring. Even the best product may fail if the surface is not prepared properly.

Common preparation steps include:

  • Cleaning the surface
  • Removing dust and loose particles
  • Grinding or mechanical preparation
  • Repairing cracks or damaged patches
  • Removing oil or contamination
  • Applying suitable primer where required

Good surface preparation helps improve bonding and floor life.

4. Choose the Required Thickness

Different industrial areas need different flooring thickness. A light-duty warehouse may need a different system compared to a heavy manufacturing unit.

Thickness selection depends on:

  • Traffic intensity
  • Load movement
  • Chemical exposure
  • Expected service life
  • Existing floor condition
  • Cleaning method

5. Decide the Finish

The floor finish should match site requirements. Common finish considerations include:

  • Smooth finish
  • Anti-skid finish
  • Glossy finish
  • Matte finish
  • Decorative finish
  • Line marking compatibility

For areas with water, oil, or chemical exposure, anti-skid properties may be important.

6. Consider Chemical Exposure

If the floor is exposed to chemicals, oils, solvents, or cleaning agents, the epoxy system must be selected accordingly. Chemical-resistant flooring helps protect the concrete surface and improves long-term durability.

7. Plan Maintenance Requirements

A good industrial flooring system should be easy to clean and maintain. Before final selection, the maintenance team should understand:

  • Cleaning frequency
  • Cleaning chemicals used
  • Machine cleaning requirement
  • Repair procedure
  • Expected traffic pattern

Common Areas Where Epoxy Flooring Is Used

Epoxy flooring can be used in multiple industrial and commercial applications, including:

  • Warehouse storage areas
  • Factory production floors
  • Assembly lines
  • Machine rooms
  • Loading and unloading areas
  • Automobile workshops
  • Packaging units
  • Pharmaceutical production areas
  • Food processing units
  • Industrial corridors
  • Maintenance areas

Each area may require a different flooring approach depending on the traffic, exposure, and performance requirement.


Mistakes to Avoid While Selecting Epoxy Flooring

Avoid these common mistakes:

  • Selecting flooring only based on price
  • Ignoring concrete surface condition
  • Applying epoxy on damp or contaminated concrete
  • Skipping surface preparation
  • Using the wrong thickness
  • Not considering traffic load
  • Ignoring chemical exposure
  • Not planning downtime for application
  • Choosing aesthetics over performance

The right epoxy flooring system should balance performance, durability, maintenance, and budget.


Why Choose Fairmate Prashita for Industrial Flooring Support?

Fairmate Prashita supports industrial flooring requirements with practical product guidance and site-focused solutions. Our approach helps contractors, engineers, architects, and factory teams choose flooring systems based on actual application conditions.

Fairmate Prashita industrial flooring solutions support:

  • Warehouses
  • Factories
  • Industrial plants
  • Production areas
  • Commercial floors
  • Heavy traffic zones
  • Maintenance-sensitive facilities

Whether the requirement is dust control, surface protection, chemical resistance, easy cleaning, or premium finish, selecting the right flooring system is important for long-term performance.


Conclusion

Epoxy flooring is a smart solution for warehouses and factories where durability, cleanliness, surface protection, and easy maintenance are required. However, the success of the flooring system depends on correct product selection, surface preparation, application method, and site condition assessment.

For industrial flooring guidance, system recommendation, or site consultation, connect with Fairmate Prashita.

Request Flooring Guide
Toll Free: 1800 571 8862
Website: www.fairmateprashita.com

Fairmate Prashita protective coatings for concrete and steel surfaces in industrial and infrastructure projects

Protective Coatings for Concrete and Steel: Complete Guide | Fairmate Prashita

Fairmate Prashita protective coatings for concrete and steel surfaces in industrial and infrastructure projects

Protective Coatings for Concrete and Steel: Complete Guide

Concrete and steel are two of the most important materials used in modern construction and industrial infrastructure. From factories, warehouses, bridges, basements, water-retaining structures and parking areas to manufacturing plants and utility zones, these materials are exposed to moisture, chemicals, abrasion, carbonation, corrosion and weathering.

Protective coatings help create a durable barrier between the surface and the surrounding environment. For engineers, contractors and industrial buyers, the right coating system can improve service life, reduce maintenance cost and protect critical assets from early deterioration.

Fairmate Prashita offers construction chemical solutions including industrial flooring and protective coating systems for long-term site performance. (Fairmate Prashita)


What Are Protective Coatings?

Protective coatings are specially designed surface-applied systems used to protect concrete and steel from environmental, mechanical and chemical damage.

They are not only applied for appearance. Their main purpose is performance protection.

A good protective coating system can help improve:

✅ Surface durability
✅ Resistance to moisture ingress
✅ Resistance to chemicals and abrasion
✅ Protection against corrosion
✅ Cleanability and maintenance
✅ Long-term structural performance
✅ Aesthetic appearance of industrial and commercial spaces

For concrete and steel surfaces, coating selection should be based on exposure condition, surface condition, traffic load, chemical contact, temperature, moisture level and expected service life.


Why Protective Coatings Are Important for Concrete

Concrete is strong in compression, but it is naturally porous. Water, carbon dioxide, chlorides, sulphates and chemicals can enter through pores, cracks or weak surface zones. Over time, this may lead to reinforcement corrosion, surface scaling, cracking, dampness, dusting and durability loss.

Protective coatings for concrete help reduce direct exposure to aggressive elements.

They are commonly used for:

✅ Industrial floors
✅ Parking decks
✅ Basements
✅ Water tanks
✅ Factory walls and floors
✅ Chemical storage areas
✅ Utility rooms
✅ Commercial buildings
✅ Infrastructure structures
✅ Concrete repair protection

AMPP notes that concrete assets are coated to protect them against harsh service environments, and coating performance depends heavily on correct surface preparation. (ampp.org)


Why Protective Coatings Are Important for Steel

Steel is widely used in factories, structural frames, tanks, pipelines, platforms, equipment foundations and industrial infrastructure. However, when steel is exposed to moisture and oxygen, corrosion may begin.

Corrosion can reduce steel thickness, weaken structural performance, damage appearance and increase maintenance cost.

Protective coatings for steel help create a barrier against:

✅ Moisture
✅ Oxygen
✅ Industrial fumes
✅ Chemical splashes
✅ Weather exposure
✅ Salt-laden environments
✅ Abrasion and wear

For steel, coating selection must consider surface preparation grade, corrosion environment, dry film thickness, primer compatibility and topcoat performance.


Common Types of Protective Coatings

Different coating systems are used depending on project requirement. The most common types include:

1. Epoxy Coatings

Epoxy coatings are widely used for concrete and steel protection because of their strong adhesion, chemical resistance and durability.

They are suitable for:

✅ Industrial floors
✅ Warehouses
✅ Production areas
✅ Concrete protection
✅ Steel structures
✅ Chemical handling zones

Epoxy coatings are preferred where strength, bonding and chemical resistance are important.

2. Polyurethane Coatings

PU coatings are known for flexibility, UV resistance and abrasion resistance, depending on the system type.

They are suitable for:

✅ Exposed surfaces
✅ Parking areas
✅ Industrial floors
✅ Protective topcoats
✅ Areas requiring better weather resistance

3. Anti-Carbonation Coatings

Anti-carbonation coatings are mainly used on concrete surfaces to reduce carbon dioxide penetration and protect reinforcement from corrosion risk.

They are suitable for:

✅ RCC structures
✅ Bridges
✅ Exterior concrete walls
✅ Infrastructure projects
✅ Repair and rehabilitation work

4. Cementitious Protective Coatings

Cementitious coatings are used for concrete protection, waterproofing support and surface protection in specific applications.

They are suitable for:

✅ Water-retaining structures
✅ Basements
✅ Wet areas
✅ Concrete protection zones

5. Anti-Corrosive Coatings

Anti-corrosive coatings are used on steel surfaces to protect against rust and industrial exposure.

They are suitable for:

✅ Steel structures
✅ Tanks
✅ Pipelines
✅ Plant equipment
✅ Fabrication units
✅ Industrial sheds


Surface Preparation: The Most Important Step

Protective coating failure often starts before the coating is applied. Poor surface preparation is one of the biggest reasons for peeling, blistering, debonding, pinholes and premature failure.

For concrete, the surface must be checked for:

✅ Dust and laitance
✅ Oil, grease and contamination
✅ Weak or loose concrete
✅ Cracks and honeycombing
✅ Moisture condition
✅ Surface profile
✅ Previous coating compatibility

For steel, the surface must be checked for:

✅ Rust
✅ Mill scale
✅ Oil and grease
✅ Dust
✅ Existing coating failure
✅ Surface profile after blasting or cleaning

Concrete surface preparation standards highlight the need for a clean, sound, dry and properly profiled surface before applying coating or lining systems. (relisleeve.com)


How Protective Coatings Improve Durability

Protective coatings improve durability by limiting the contact between the structure and damaging external conditions.

They can help protect against:

✅ Water ingress
✅ Reinforcement corrosion
✅ Chemical attack
✅ Surface abrasion
✅ Carbonation
✅ Dusting
✅ Weathering
✅ Industrial contamination
✅ Cleaning chemical exposure

In industrial and infrastructure projects, durability is not optional. A failed coating can lead to downtime, repair cost, production disturbance and safety concerns.

This is why product selection and application quality must be treated as technical decisions, not only commercial decisions.


Key Areas Where Protective Coatings Are Used

Protective coatings are useful across many construction and industrial segments.

Industrial Projects

Factories, manufacturing units, warehouses, chemical plants, food processing units and utility buildings need coatings that support durability, cleanability and surface protection.

Commercial Buildings

Parking areas, service zones, basements, ramps, terrace equipment areas and exposed RCC surfaces require protective systems for long-term performance.

Infrastructure Projects

Bridges, flyovers, tunnels, water-retaining structures, treatment plants and marine-adjacent structures require protection from aggressive environments.

Steel Fabrication and Equipment

Steel tanks, platforms, pipelines, machinery bases and structural members need anti-corrosive protection to reduce rusting and maintenance frequency.


Common Protective Coating Failure Reasons

Protective coating problems can happen due to poor selection, poor preparation or poor application.

Common reasons include:

✅ Wrong coating system selection
✅ Poor surface cleaning
✅ Moisture trapped below coating
✅ Inadequate surface profile
✅ Application on weak substrate
✅ Incorrect mixing ratio
✅ Wrong application thickness
✅ Poor curing conditions
✅ Chemical exposure before full cure
✅ Incompatible primer or topcoat

To avoid failure, the project team should follow manufacturer guidance, conduct proper inspection and ensure applicators are trained for the selected system.


How to Select the Right Protective Coating

Before selecting a coating system, engineers and industrial buyers should evaluate:

✅ Surface type: concrete or steel
✅ Indoor or outdoor exposure
✅ Chemical exposure level
✅ Traffic and abrasion load
✅ Moisture condition
✅ Temperature during application
✅ Required finish
✅ Expected service life
✅ Maintenance schedule
✅ Application method
✅ Site shutdown time available

A coating used for a parking deck may not be suitable for a chemical storage area. Similarly, a steel structure exposed to industrial fumes may need a different system than an indoor equipment frame.

Correct coating selection should always be based on site condition and performance requirement.


Protective Coatings and Maintenance Planning

Protective coatings reduce maintenance, but they do not remove the need for inspection.

A proper maintenance plan should include:

✅ Regular surface inspection
✅ Checking cracks, peeling or blistering
✅ Cleaning chemical spills quickly
✅ Repairing damaged coating areas early
✅ Recoating before major failure
✅ Monitoring steel corrosion signs
✅ Checking water ponding areas

Early repair of coating damage can prevent larger surface failure and reduce long-term cost.


Fairmate Prashita Protective Coating Support

Fairmate Prashita supports engineers, contractors, applicators and industrial buyers with construction chemical solutions for concrete protection, industrial flooring, waterproofing, repair, grouting and protective coating requirements. (Fairmate Prashita)

Our technical team can help guide product selection based on surface type, project condition and performance requirement.

For coating support, connect with Fairmate Prashita.

📞 Call: 1800 571 8862
🌐 Website: www.fairmateprashita.com


Best Product Links:-

  1. SAFECORE PUD
    Best anchor text: polyurethane dispersion protective coating
    Use in section: Common types of protective coatings
  2. SAFECORE ANTICORROSIVE COAT
    Best anchor text: anti-corrosive coating for steel and rebars
    Use in section: Why protective coatings are important for steel
  3. SAFECORE EP PRIMER
    Best anchor text: epoxy primer for protective coating systems
    Use in section: Surface preparation and primer compatibility
  4. FAIRCOAT ELASTOMERIC
    Best anchor text: elastomeric protective coating
    Use in section: Protective coatings for exterior concrete surfaces

Conclusion

Protective coatings are essential for improving the durability, service life and performance of concrete and steel structures. They protect surfaces from moisture, corrosion, chemicals, abrasion, carbonation and industrial exposure.

For engineers and industrial buyers, the right coating system can reduce maintenance cost, improve safety and extend asset life. However, coating performance depends on correct product selection, proper surface preparation, skilled application and regular inspection.

Whether the project involves concrete floors, steel structures, basements, parking areas, factories, warehouses or infrastructure assets, protective coatings should be selected with a clear technical approach.

Request coating support from Fairmate Prashita for the right protective coating solution for your project.

How Construction Chemicals Improve Concrete Strength | Fairmate Prashita

How Construction Chemicals Improve Concrete Strength

How Construction Chemicals Improve Concrete Strength

Concrete strength is one of the most important factors in any construction project. Whether it is a residential building, commercial structure, bridge, factory floor, road, basement, or infrastructure project, concrete must perform under load, weather exposure, site conditions, and long-term usage.

But concrete strength does not depend only on cement. It depends on proper mix design, water-cement ratio, aggregate quality, compaction, curing, placement method, and the correct use of construction chemicals. This is where concrete admixtures play a major role.

Fairmate Prashita offers a wide range of concrete admixture solutions under product families such as FAIRCRETE, FAIRFLO and BROCRETE, including plasticizers, superplasticizers, retarders, slump retainers, accelerators, mineral admixtures, fibers and plastering admixtures for improving concrete workability and performance. (Fairmate Prashita)


What Are Construction Chemicals in Concrete?

Construction chemicals are specially designed materials added to concrete, mortar, or cement-based systems to improve performance. In concrete, the most commonly used construction chemicals are admixtures.

Concrete admixtures are added during batching or mixing to modify the fresh and hardened properties of concrete. They help improve workability, strength, setting time, durability, pumpability, water reduction, and placement quality.

Concrete itself is made from cement, water, fine aggregate and coarse aggregate. Cement reacts with water through hydration and binds the aggregates into a hardened mass. (American Cement Association) However, site conditions are rarely perfect. Temperature changes, long transportation time, congested reinforcement, pumping distance, low water-cement ratio, and durability requirements can make concrete difficult to place and finish.

Construction chemicals help engineers and contractors manage these challenges more effectively.


Why Concrete Strength Depends on More Than Cement

Many people assume that adding more cement automatically increases concrete strength. In reality, strong concrete depends on balance.

The key factors that influence concrete strength include:

✅ Correct water-cement ratio
✅ Proper aggregate grading
✅ Good compaction
✅ Controlled workability
✅ Proper curing
✅ Suitable admixture selection
✅ Correct placement and finishing
✅ Protection from early drying or poor site conditions

If excess water is added to concrete for easier placement, strength can reduce. If concrete is too stiff, it may not compact properly, leading to honeycombing and voids. If concrete loses slump before placement, the finish and compaction may suffer.

This is why admixtures are important. They help achieve better workability without unnecessary water addition.


1. Water-Reducing Admixtures Improve Strength

One of the most important ways construction chemicals improve concrete strength is by reducing water demand.

Concrete needs water for hydration, but extra water creates capillary pores inside the hardened concrete. These pores can reduce strength and increase permeability. A lower water-cement ratio usually helps produce stronger and denser concrete when the mix is properly designed and placed.

Water-reducing admixtures and superplasticizers allow concrete to remain workable even with reduced water content. This helps improve:

✅ Compressive strength
✅ Concrete density
✅ Surface finish
✅ Durability
✅ Pumpability
✅ Reduced shrinkage risk

For RMC plants and contractors, this is especially useful because concrete must remain workable during transportation, pumping, placement and finishing.

Best Product Link:- FAIRFLO RMC 100


2. Superplasticizers Support High-Performance Concrete

Superplasticizers are high-range water-reducing admixtures used to produce flowing concrete without increasing water content.

They are useful for:

✅ High-strength concrete
✅ RMC concrete
✅ Pumped concrete
✅ Congested reinforcement areas
✅ High-rise construction
✅ Infrastructure projects
✅ Precast concrete
✅ Self-compacting concrete

When concrete needs high flow and high strength together, superplasticizers become very important. They help maintain workability while supporting a lower water-cement ratio.

This is especially useful for engineers and contractors working on columns, beams, slabs, bridges, foundations, industrial floors and heavy-duty structures.

Best Product Link:-FAIRFLO S


3. Slump Retainers Help Maintain Workability

Concrete may lose workability during transportation, especially in hot weather or long-distance delivery. When concrete reaches the site with low slump, workers may add water to make it easier to place. This can reduce strength and affect durability.

Slump-retaining admixtures help concrete maintain workability for a longer time. This is useful for:

✅ RMC supply
✅ Long travel distance
✅ Hot weather concreting
✅ Large pours
✅ Pumping applications
✅ Infrastructure projects

By controlling slump loss, these admixtures help reduce the need for site water addition and support better final concrete performance.

reference Link:- https://www.fairmateprashita.com/blog/faircrete-admixtures-enhancing-concrete-quality-in-every-pour/


4. Accelerators Help Early Strength Development

In some projects, early strength is important. For example, precast elements, repair works, road works, and fast-track construction may need quick strength gain.

Accelerating admixtures help speed up the setting and early strength development of concrete. They are useful when:

✅ Early formwork removal is required
✅ Faster project cycle is needed
✅ Cold weather slows down hydration
✅ Precast production needs faster turnover
✅ Repair work must be completed quickly

However, accelerators must be selected carefully based on cement type, temperature, mix design and project requirement.

reference Link:- https://www.fairmateprashita.com/Solutions/construction_chemicals/


5. Retarders Help Control Setting Time

In hot weather or mass concrete work, concrete may set too quickly. This can create problems during transportation, placement, finishing and joint management.

Retarding admixtures help slow down the setting time of concrete. They are useful for:

✅ Hot weather concreting
✅ Large raft foundations
✅ Long-distance concrete supply
✅ Mass concrete pours
✅ Complex placement work
✅ Extended finishing time

By controlling setting time, retarders help maintain workable concrete for longer and reduce the risk of cold joints or poor finishing.

reference Link:- https://www.fairmateprashita.com/Solutions/construction_chemicals


6. Mineral Admixtures Improve Density and Durability

Mineral admixtures such as micro silica and other supplementary materials help improve concrete density and durability. Fairmate Prashita lists FAIRMATE MICRO SILICA among its admixture product range, described for applications such as tall buildings, marine structures, shotcrete, underground construction, waterproof basements, bridges, floors and pavements. (Fairmate Prashita)

Mineral admixtures help improve concrete by:

✅ Refining pore structure
✅ Improving packing density
✅ Reducing permeability
✅ Supporting long-term durability
✅ Improving resistance against aggressive environments

Dense concrete is not only stronger but also more resistant to water ingress, chemical attack, chloride penetration and reinforcement corrosion.

Best Product Link:- FAIRMATE MICRO SILICA


7. Fibers Help Control Cracks

Concrete has high compressive strength but is weak in tension. Shrinkage, temperature variation and loading can create cracks. Fibers help control micro-cracking and improve toughness.

Fiber-based construction chemicals are useful for:

✅ Industrial floors
✅ Pavements
✅ Plastering
✅ Shotcrete
✅ Precast products
✅ Crack-control applications

Fibers do not replace structural steel reinforcement where it is required, but they help improve crack resistance and surface performance in many applications.

reference Link:- https://www.fairmateprashita.com/Solutions/construction_chemicals


8. Admixtures Improve Pumpability and Placement Quality

Strong concrete is not only about laboratory cube strength. It must also be properly placed at site.

If concrete is difficult to pump or place, it may lead to segregation, honeycombing, voids and poor compaction. These problems can reduce actual in-structure strength.

Admixtures improve pumpability by controlling flow, cohesion and workability. This helps contractors achieve:

✅ Better concrete movement through pipelines
✅ Reduced blockage risk
✅ Better compaction
✅ Uniform placement
✅ Improved finish
✅ Reduced site rejection

For high-rise buildings, large slabs, foundations and RMC projects, pumpable concrete is a major requirement.

Best Product Link:- FAIRMATE SMOOTH PUMPING AID(L)


9. Construction Chemicals Improve Durability, Not Just Strength

Concrete strength and concrete durability are connected, but they are not the same.

A concrete mix may achieve good early strength but still fail in durability if it is highly permeable, poorly cured, or exposed to aggressive conditions without protection.

Construction chemicals help improve durability by reducing water demand, improving density, controlling cracks, enhancing workability and reducing permeability.

This helps protect concrete against:

✅ Water ingress
✅ Chloride attack
✅ Sulphate exposure
✅ Reinforcement corrosion
✅ Carbonation
✅ Surface wear
✅ Long-term deterioration

For infrastructure, industrial and commercial projects, durability is as important as compressive strength.

Best Product Link:- FAIRCRETE RMW


Common Concrete Problems That Admixtures Help Reduce

The right admixture system can help reduce many common concrete problems, including:

✅ Low workability
✅ Excess water addition
✅ Slump loss
✅ Honeycombing
✅ Segregation
✅ Bleeding
✅ Low early strength
✅ Poor pumpability
✅ Shrinkage cracks
✅ Reduced durability
✅ Surface finishing issues

However, admixtures must be selected based on the actual project requirement. The same admixture is not suitable for every concrete mix.


How Engineers and RMC Plants Should Select Concrete Admixtures

Before selecting an admixture, engineers and RMC teams should check:

✅ Concrete grade
✅ Cement type
✅ Aggregate quality
✅ Required slump
✅ Retention time
✅ Placement method
✅ Pumping distance
✅ Weather condition
✅ Site application
✅ Strength requirement
✅ Durability requirement
✅ Trial mix performance

Trial mixes are very important because admixture performance may vary based on cement chemistry, aggregate shape, fines content, temperature and mixing method.

Fairmate Prashita provides technical support for product selection, application guidance and construction chemical requirements through its website support system and toll-free assistance. (Fairmate Prashita)


Conclusion

Construction chemicals play a major role in improving concrete strength, durability and site performance. They help control water demand, improve workability, maintain slump, support early strength, improve density, reduce permeability and make concrete easier to place.

For engineers, RMC plants and contractors, the right admixture is not just an additive — it is a performance tool.

By selecting suitable concrete admixture solutions, construction professionals can achieve stronger, more durable and more reliable concrete for modern building, infrastructure and industrial projects.

Explore Fairmate Prashita concrete admixture solutions for better workability, strength and long-term concrete performance.

📞 Call: 1800 571 8862
🌐 Website: www.fairmateprashita.com